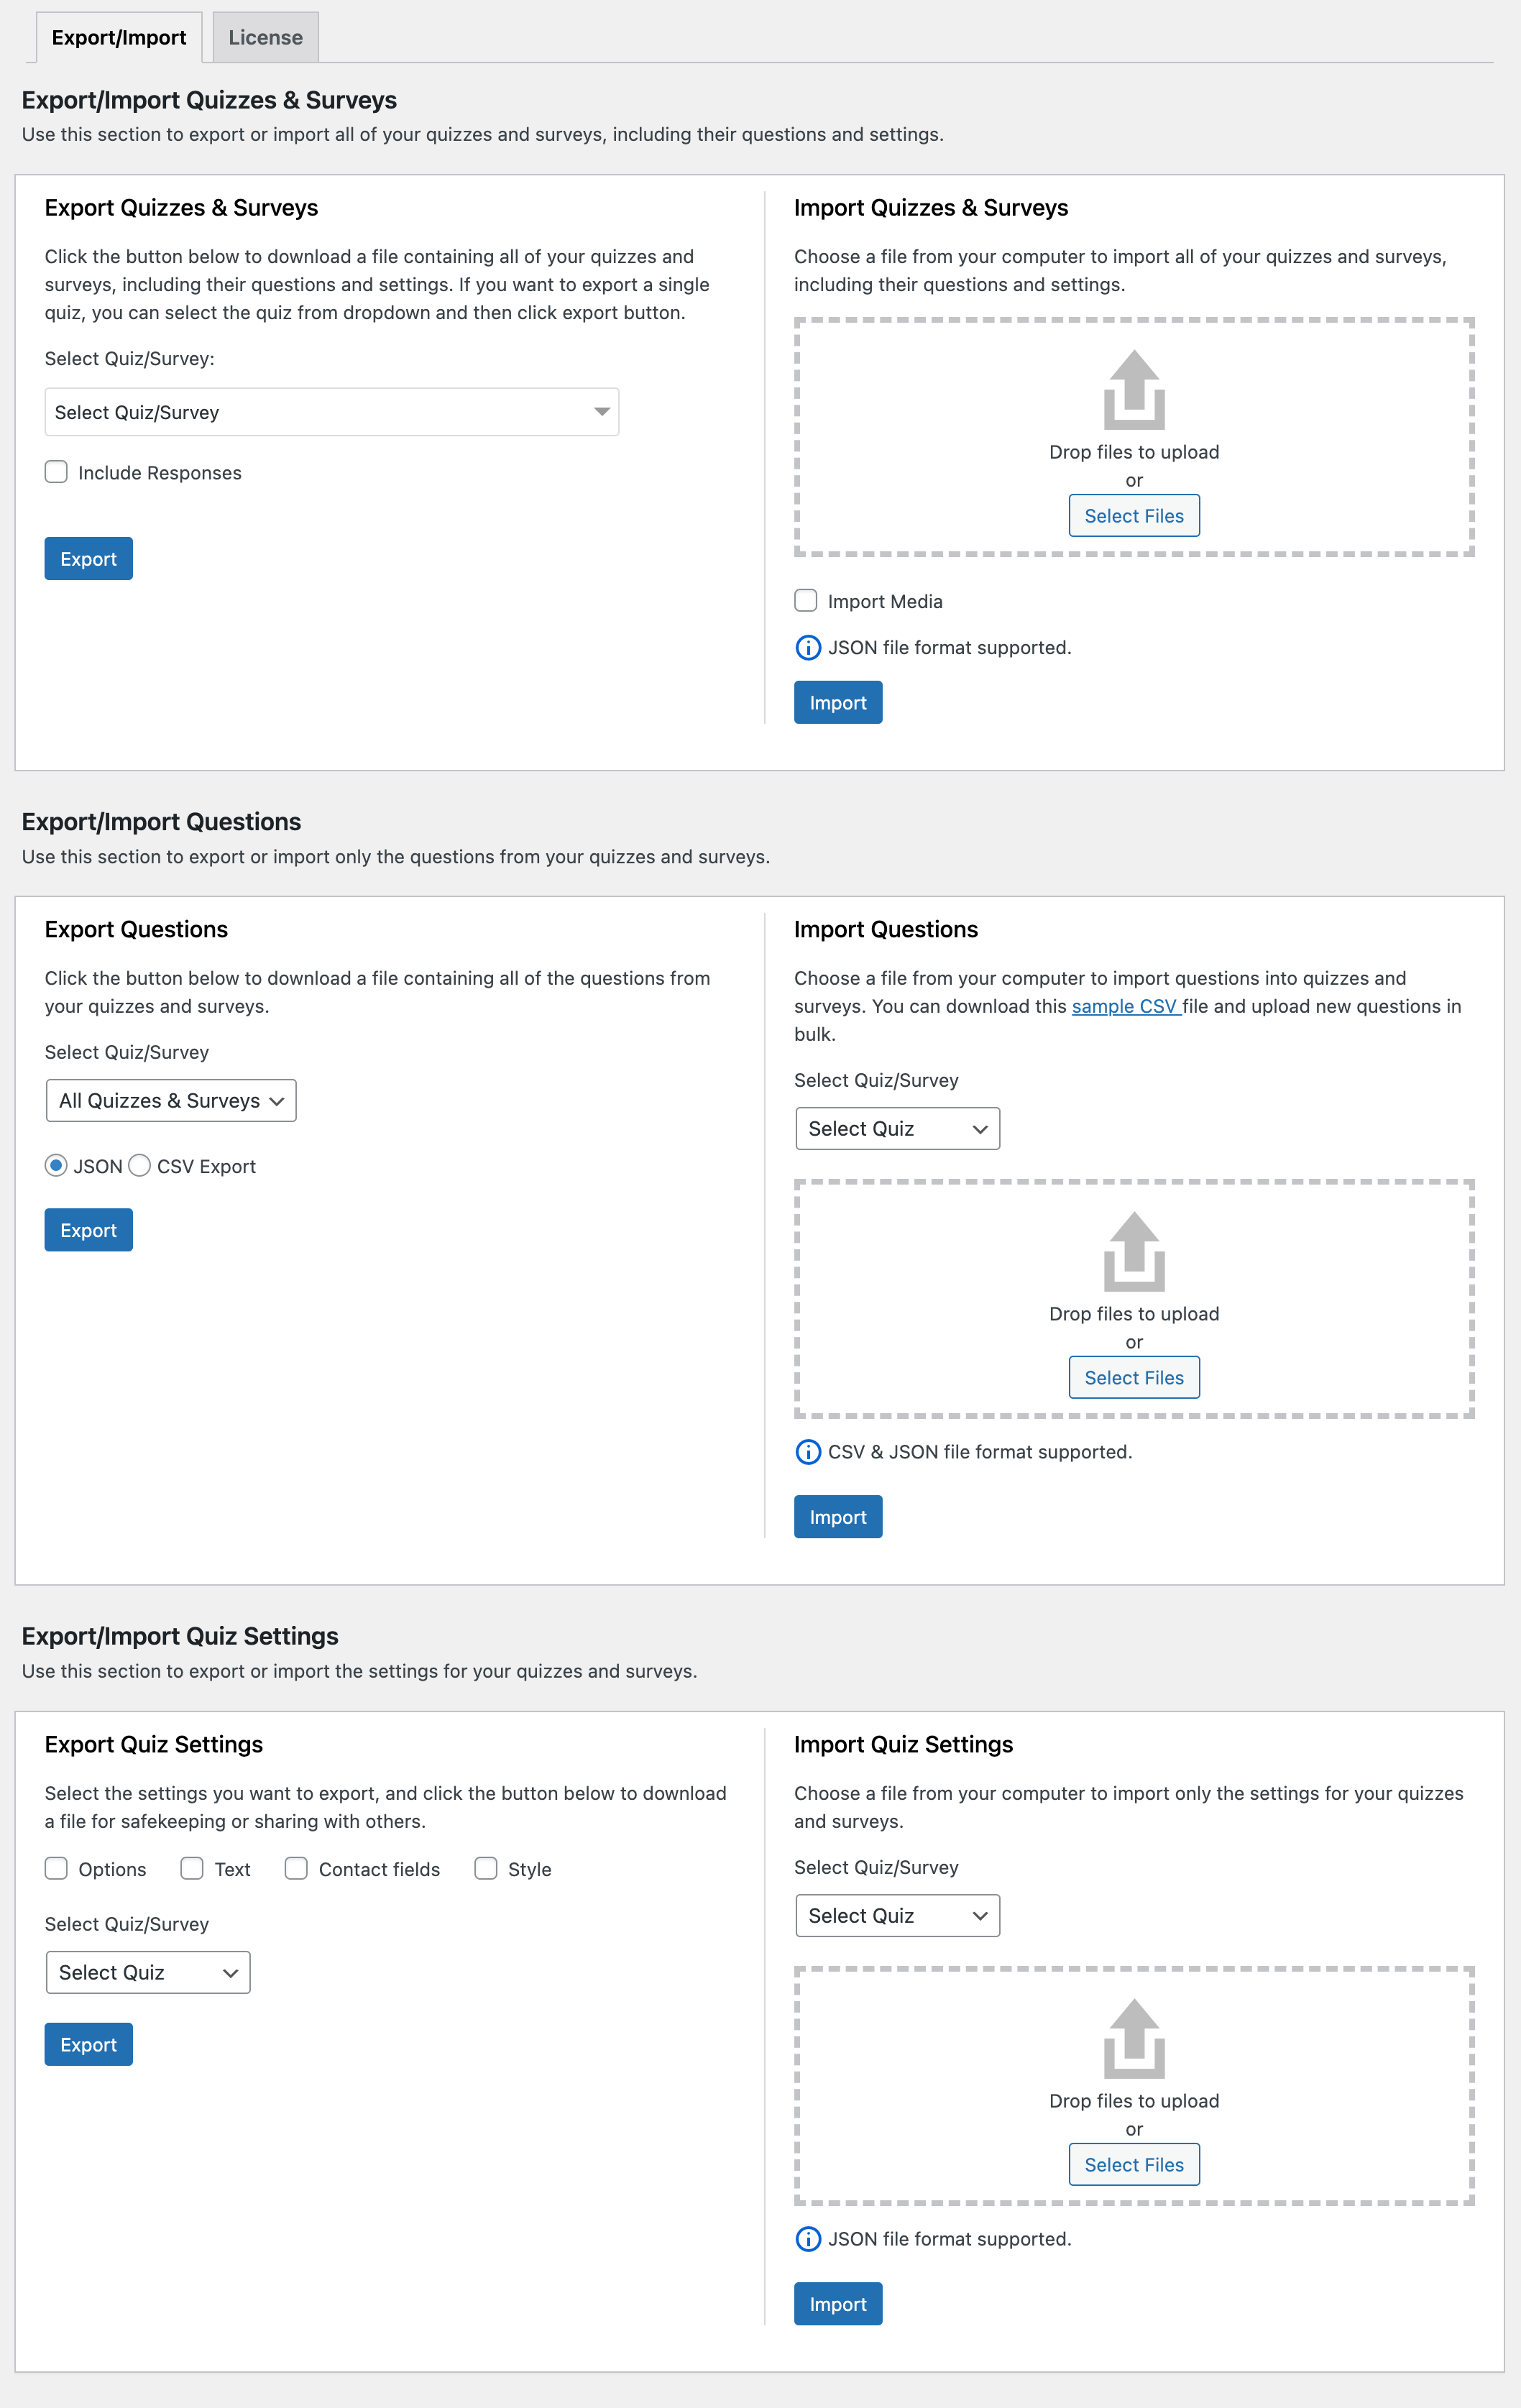
The Export & Import Addon allows you to export your quizzes/surveys, questions, and quiz/survey settings from one website and import them into another website.
INSTALLATION/SETUP
Once you have purchased the addon, you will have access to download the addon. To install, simply upload the addon as a normal WordPress plugin. To do so, go to the Plugins page and click Add New. Then, click Upload. From there, upload the zip file that you downloaded when downloading the addon.
Once the addon has been uploaded, you should now have the plugin QSM – Export & Import listed in your list of plugins. Activate that plugin. Once activated, the addon will add a new tab in the Addon Settings labeled Export And Import.
SETTINGS/CONFIGURE

Before you can use the Import Export addon, you must first enter the license key. Note that the addon won’t work without a valid license key. Enter your license key from your account into the “Addon License Key” field on the “Export And Import” tab of the “Addon Settings” in Installed Addons.
Export/Import Quizzes & Surveys

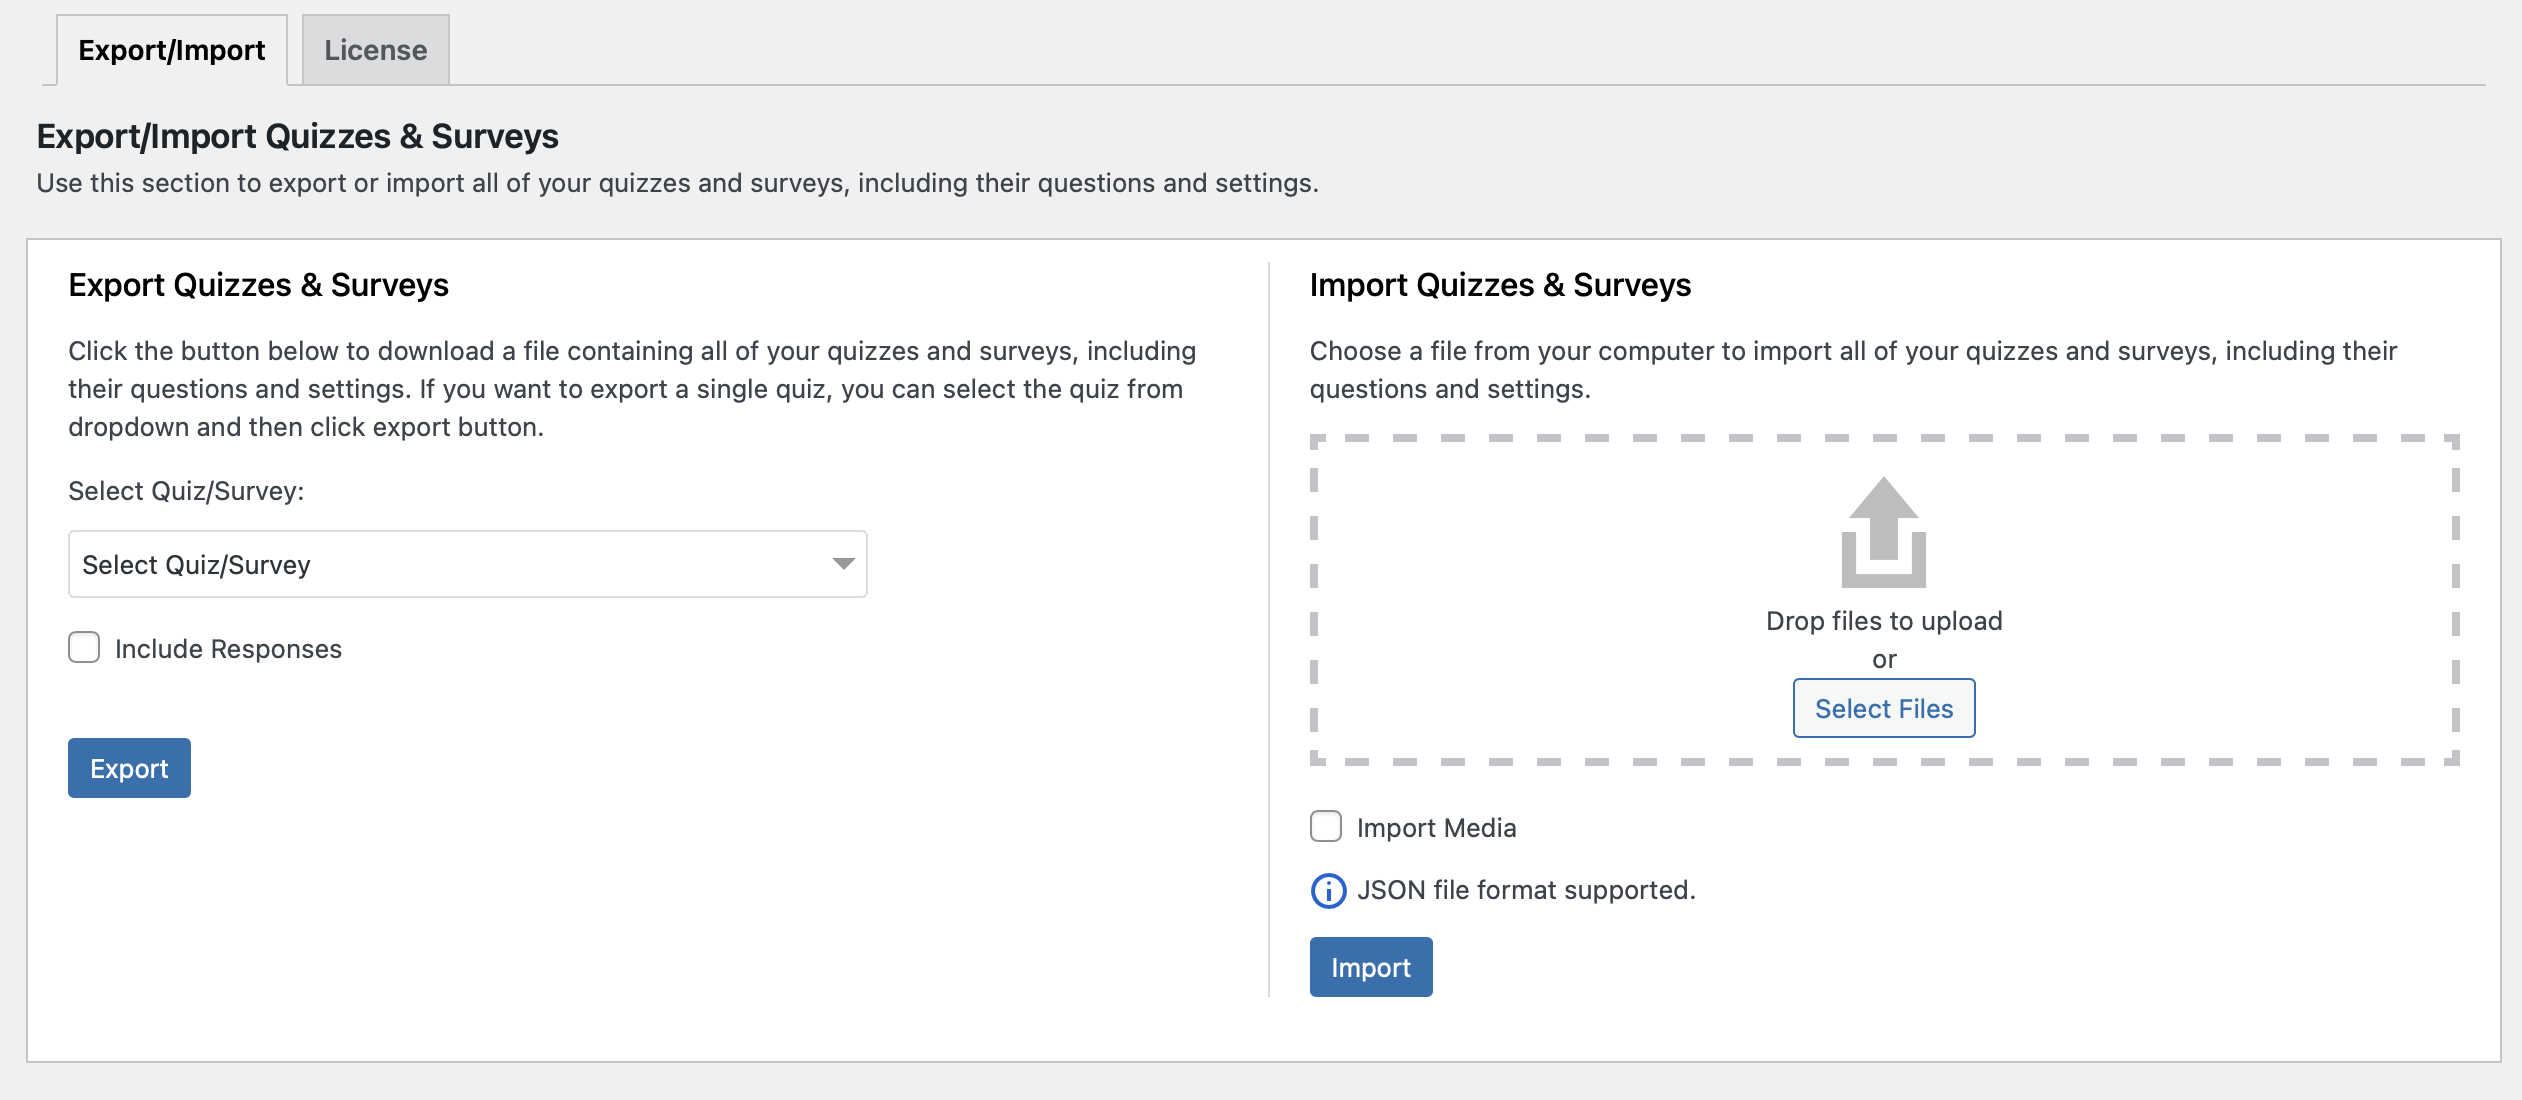
In this section, you can select all of your quizzes & surveys including their questions and settings to be exported or imported. It also allows you to include responses while exporting/importing the quizzes and surveys. You have to click on the “Include Responses” checkbox to export the quizzes/surveys with their response data.
In the Export/Import Quiz option, you can select individual quizzes or surveys from the dropdown to export or select multiple quizzes and surveys you want to export. If you want to select all the options, click on “select all” to choose all of the quizzes and surveys to export.
Note:
The export file will be in .JSON format. The plugin should prompt you to download your export file. On some browsers, the contents of the export may be shown in the tab instead of being downloaded. Simply right-click, and choose “Save As..” to download the export file as a .json file.
To import your quizzes and surveys along with their questions, settings, and responses, select the exported .JSON file from your device and click on the “Import” button.
You can also import media along with quiz data by selecting the “Import Media” checkbox. This will fetch media from URLs included in the quiz data.
Export/Import Questions

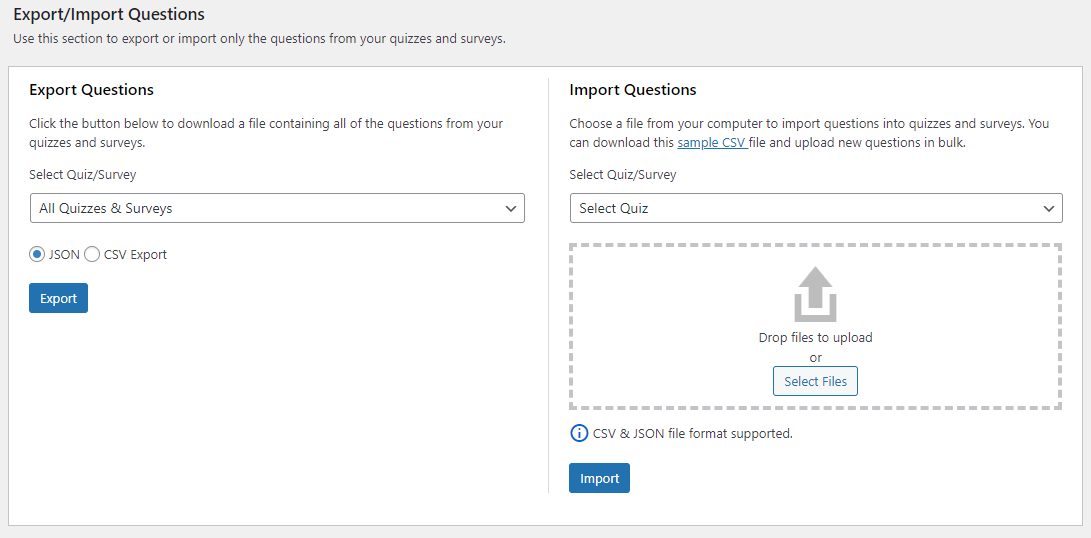
In this section you can Export or Import Quiz/Survey questions. You can choose to export questions from “All Quizzes & Surveys” or opt to export questions from individual quizzes & surveys. Here you have the option to export questions in .JSON or .CSV files.
To Export questions, first, select the quiz from the drop-down and then choose the file types i.e. JSON or CSV Export. After you selected the desired options hit the “Export” button and the file will be exported.
While Importing questions into the quiz/survey you again are allowed only to upload files in .JSON or .CSV file formats only. The process of importing questions via. JSON file is simple just locate the .JSON file on your computer and hit the import button the questions will be imported. Note that you can’t edit the .JSON file. However, if you want to add more questions manually you can do so with the .CSV file.
Make sure the Questions and Answers file that you are about to upload is in the CSV or JSON File Format only. Next, select the quiz/survey to which you want to import the questions and then hit the “Select Files” button to search for the file to upload from your computer, locate the file, and hit the Open button. Lastly, hit Import to import the file.
Importing Questions through CSV file (Using Sample CSV)
If you intend to edit the CSV and want to include more questions of your choice then you can edit the previously exported CSV and add new questions in the same format or download a Sample CSV and add questions accordingly.
Note that once you add questions and save your file the format remains .CSV. If the file format is changed the addon won’t accept the file and your questions will not be imported onto the desired quiz/survey. Therefore, we recommend copying the file contents into google sheets and downloading the file in .CSV format instead of directly uploading the file to ensure the correct file format is imported.
What does each input cell mean in the Demo CSV?
- Item Type: Refers to the Question or Answer Type. Enter the Item type as Question or Answer in reference to the corresponding option columns.
- Question Title: Refers to the Question Title, Enter the Question Title in this column.
- Question Description: Refers to the description of each question, Enter the description in this column.
- Answer Text: Refers to the text of the answer, Enter the answer text in this column. If it is an image answer, you should add an image URL instead of text.
- Answer Point: Refers to the point given to the individual answer, Enter the point score in this column.
- Answer Correct/Incorrect: Where 1 means correct and 0 means incorrect, Add 1 or 0 to mark the answer as correct or incorrect.
- Answer Caption: Refers to the Image Caption in Image Answer Types.
- Answer Label: Refers to the Answer Label in the Fortune Theme, Enter the answer label to display if you are using the Fortune theme.
- Question Answer Info: Refers to the correct answer info for each question. Enter the Question Answer info for each question.
- Comments(Question Comments): 0 means Small Text Field, 1 means None, and 2 means Large Text Field. Enter the 0, 1, or 2 number in each cell to enable and set the question comments on each question.
- Hints: Refers to the hint for an individual question. Enter the hint to display.
- Question Type: Refers to the selected question type for each question. Enter the Question Type for each question.
- Required: 1 means Yes and 0 means NO. Enter 1 or 0 to make the questions required or not required respectively.
- Require all rows: Refers to the Required Fields in Radio and Checkbox Grid Advanced Question Types. Enter 1 to make all rows required and 0 to not required.
- Answer Editor(Answer Type): Enter the Answer Type you want for each question, and choose from test, rich, and image. Where, text means Text Answers, rich means Rich Answer Editor, and image means Image Answers. Note that, entering “Answer Type” activates and selects the preferred option. If you choose Rich Answer or Image Answer, you will have to enter the Answer contents in the Answer and Image links in the Text column respectively.
- Feature Image Src: Refers to the Feature image being used. Enter the link of the image to use as the featured image.
- Match Answer: Refers to the Match Answer link in the Matching Pairs Question Type. Enter the Match Answers link in this column.
- Case Sensitive: Refers to the set case sensitivity in Fill in the Blank Question Type. Enter 1 to make the blanks case-sensitive and 0 not to make them case-sensitive.
- Answer Columns: Refers to the number of Answer Columns in Grid Question Types. Enter the number of columns you need.
- Image Size-Width: Refers to the width of the image in Image Answers Answer Type. Enter the image width in numbers.
- Image Size-Height: Refers to the height of the image in Image Answers Answer Type. Enter the image height in numbers.
- Autofill: Refers to the set form fill permission in Form Options. Enter 1 to enable Autofill and 0 to disable the permission.
- Text Limit: Refers to the Maximum number of characters allowed in Text Answer Type. Enter the text limit in numbers.
- Limit Multiple Response: Refers to the number of choice selections allowed in Multiple Response Question Types. Enter the limit of choices in numbers.
- File Upload Limit: Refers to the limit in MB for File Upload Question Type. Enter the upload limit in numbers.
- Categories: Refers to the selected Category of questions. Enter the question category name for each question in this column.
Import/Export Questions with Multiple Child Categories
With the Export Import addon, you can export and import questions in the CSV file with multiple child categories too. For Example: If you have a Parent Category Math and multiple child categories like Multiplication, Subtraction, and Addition under the parent ‘Math’ category then the categories will also be imported along with the questions they are associated with.
If you want to manually add/remove categories from the CSV then you can edit the category as for example “Math,Addition” where Math is the parent and Addition is the child category. As seen in the above video.
Export/Import Quiz Settings

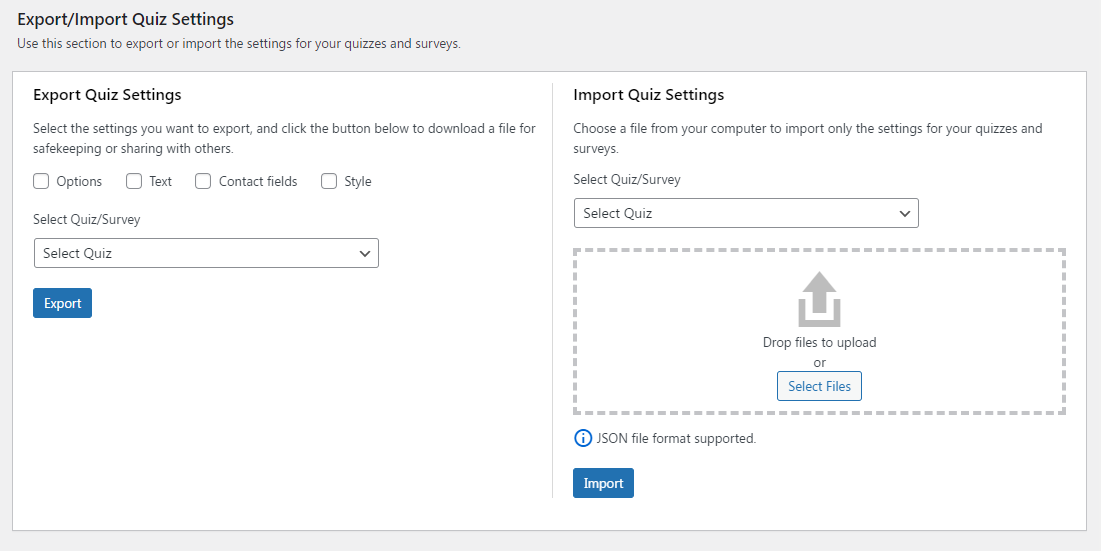
This section allows you to export/import quiz and survey settings. The Export Quiz includes settings from:
- Options tab
- Text tab settings
- Contact tab fields
- Theme and Custom CSS from the Style tab
Please Note – If you’re having issues exporting custom css, update the addon to the latest version and then export/import
To export, tick the checkbox beside each setting name and then select the particular quiz or survey. Note that you are allowed to choose any 1 quiz/survey whose settings will be exported in the JSON file. Once you are done selecting the quiz/survey, hit the “Export” button, and the file will be downloaded.
The plugin should prompt you to download your export file. On some browsers, the contents of the export may be shown in the tab instead of being downloaded. Simply right-click and choose “Save As..” to download the export file as a .json file.
To import quiz settings to another quiz/survey, first select the quiz of your choice from the dropdown in the Import Quiz settings, then upload the exported file from your computer. Once you select the file, hit the Import button, and the exported settings will be imported into your selected quiz quickly.
Note only .JSON file is accepted.
Note: If you receive an error importing the file repeatedly, your site may not be allowing this file. In order to solve this, we have a workaround, you have to add the below code to your wp-config.php file while working with the exports and imports. Also, for security purposes, please remove the code after you are finished exporting and importing.
define(‘ALLOW_UNFILTERED_UPLOADS’, true);Please remove the above code after you are finished exporting and importing.
If you have any trouble implementing the Import and Export Addon or have more questions about the process, please fill out a support ticket by going to the WordPress dashboard and selecting ‘help’ in the QSM plugin and our support guru will be able to help you.


