Effectively managing time is essential, especially when it comes to online forms like quizzes or surveys. While Google Forms offers many features, adding a timer isn’t one of its built-in options. But here’s where the Google Forms add-ons come in handy like Extended Forms.
It not only introduces the much-needed timer functionality to your Google Forms but also streamlines time management, ensuring a smooth process for both quiz creators and respondents.
Whether you’re conducting tests, setting deadlines, or simply keeping track of time, adding a Google timer through ExtendedForms makes your form more efficient.
In this post, I’ll help you create an online exam by adding a timer on Google Forms and of course, we will make use of the Extended Forms Addon.
Click on the button below to Try the Extended Forms Demo (with Timer Function)
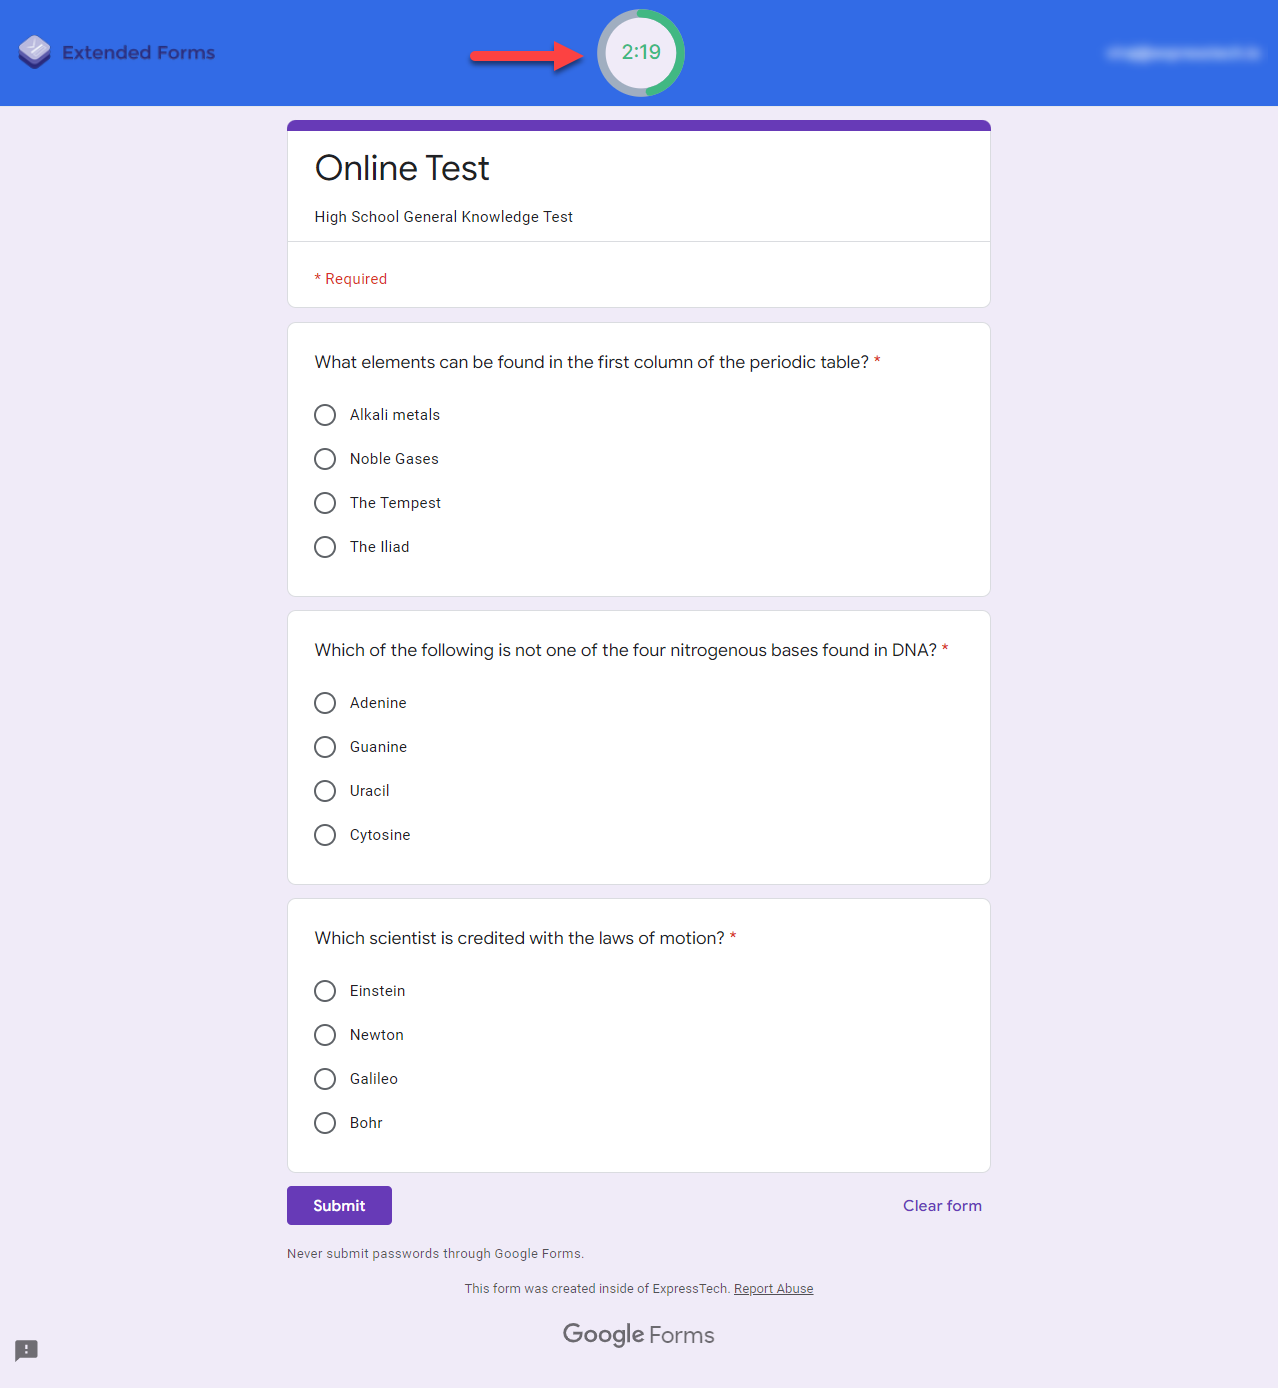
Extended Forms stands out as the top alternative to other popular timer add-ons like Form Timer and Quilgo. Its user-friendly interface makes it easy to integrate with forms, offering not only a countdown timer with a one-click setup but also features like a date-time limit for scheduling quizzes or exams, various customizable timer themes, and even an online test proctor option.
As a comprehensive solution for creating timed tests on Google Forms, Extended Forms supports a wide range of form types, from Employee Feedback and Assessments to Event Planning, Quizzes, Customer Satisfaction Surveys, Student & Parents Feedback forms, Questionnaires, Polls, and more…
With Extended Forms, you turn your effortlessly transform your ordinary Google form into a fully Google timer test for your learners.
Also Read – How to Create a Customer Satisfaction Survey in WordPress?
Here’s How to Add a Timer on Google Forms with Extended Forms Addon
- Go to Extended Forms in G Suite Marketplace.
- Sign in with your preferred Google Account and Hit the Install Button.
- Once installed navigate to the Google Forms
- Select from any of the pre-template forms from the Google form’s Education template section or you can create a new blank form.
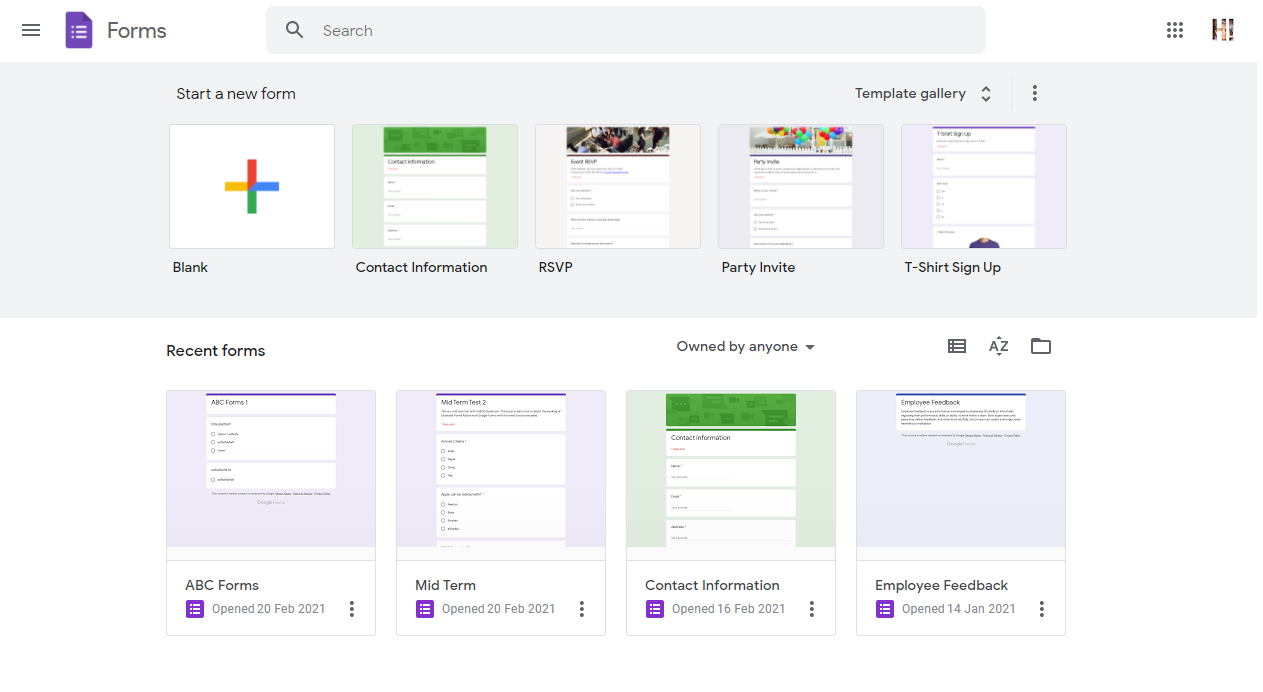
- If you have installed the Extended Forms Addon correctly, then you must see the Extended Forms in the Addons Menu. Click on the puzzle-shaped icon for it. [refresh the page once if you don’t see the extended forms option]
- Click on the Extended Forms Addon then on Configure. The Extended Forms Settings Box will appear on the Bottom Right of the Browser.

- You can configure the time limit as well as other options from the Settings Box, but to get the full view of the Extended Forms Settings hit the gear icon in the configuration box to directly navigate to the Form Settings in ExtendedForms dashboard.

- You are now taken to the Extended Forms – Forms Settings page.
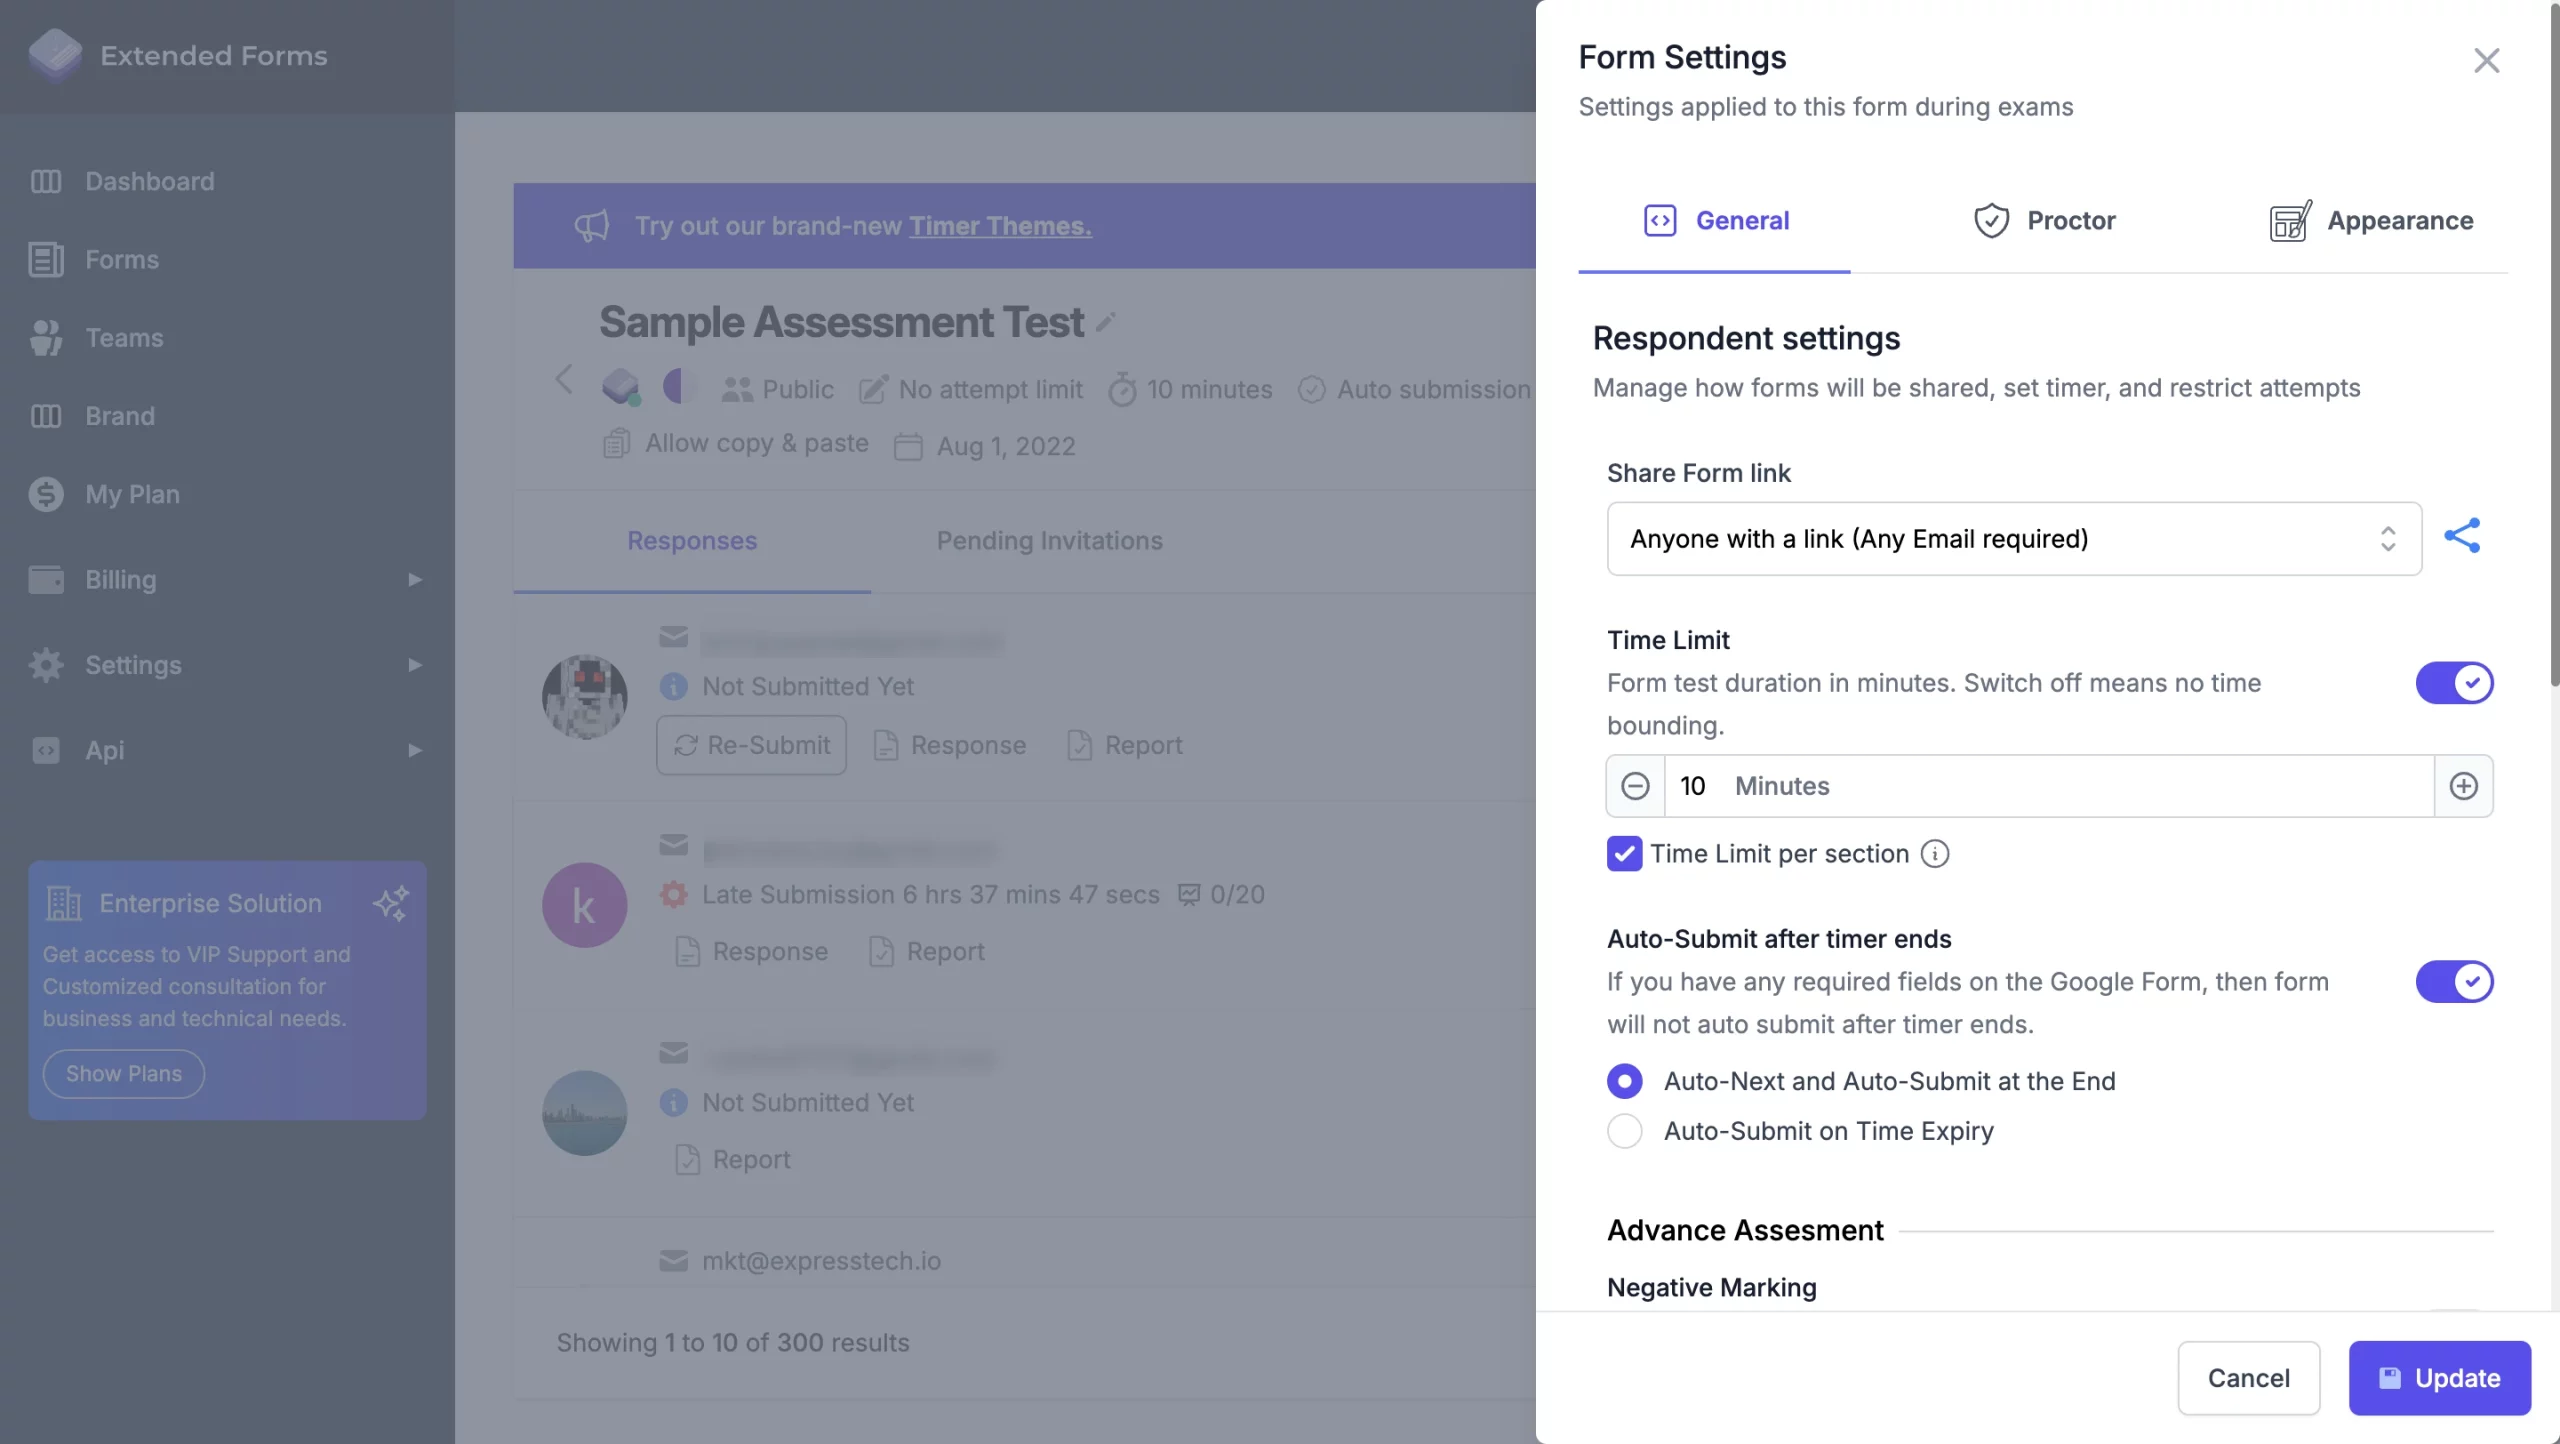
You can set the permissions to share the form as “Anyone with a link” – you can use any email to access it, or you can keep it “Public” – to give access to all, or Invite Only– where only the user with the desired link can access the form.
From here as well, you can set the Time Limit for your test. Below this timer feature you also get the option to add a time limit per section. This feature can be used for multi-section quizzes or tests.
This is how to set a Google timer in your online tests.
Based on the time limit per section —— you’ll be required to set the auto-submit option, you get two options for that.
- Auto-Next and Auto-Submit at the end
- Auto-Submit on time expiry
Note – The Hide label option will automatically be enabled once you enable the ‘time limit per section’ option.
Furthermore, you can find more options like ‘Negative Marking”, Restrict Attempts, Allow Copy-Paste option, and some more.
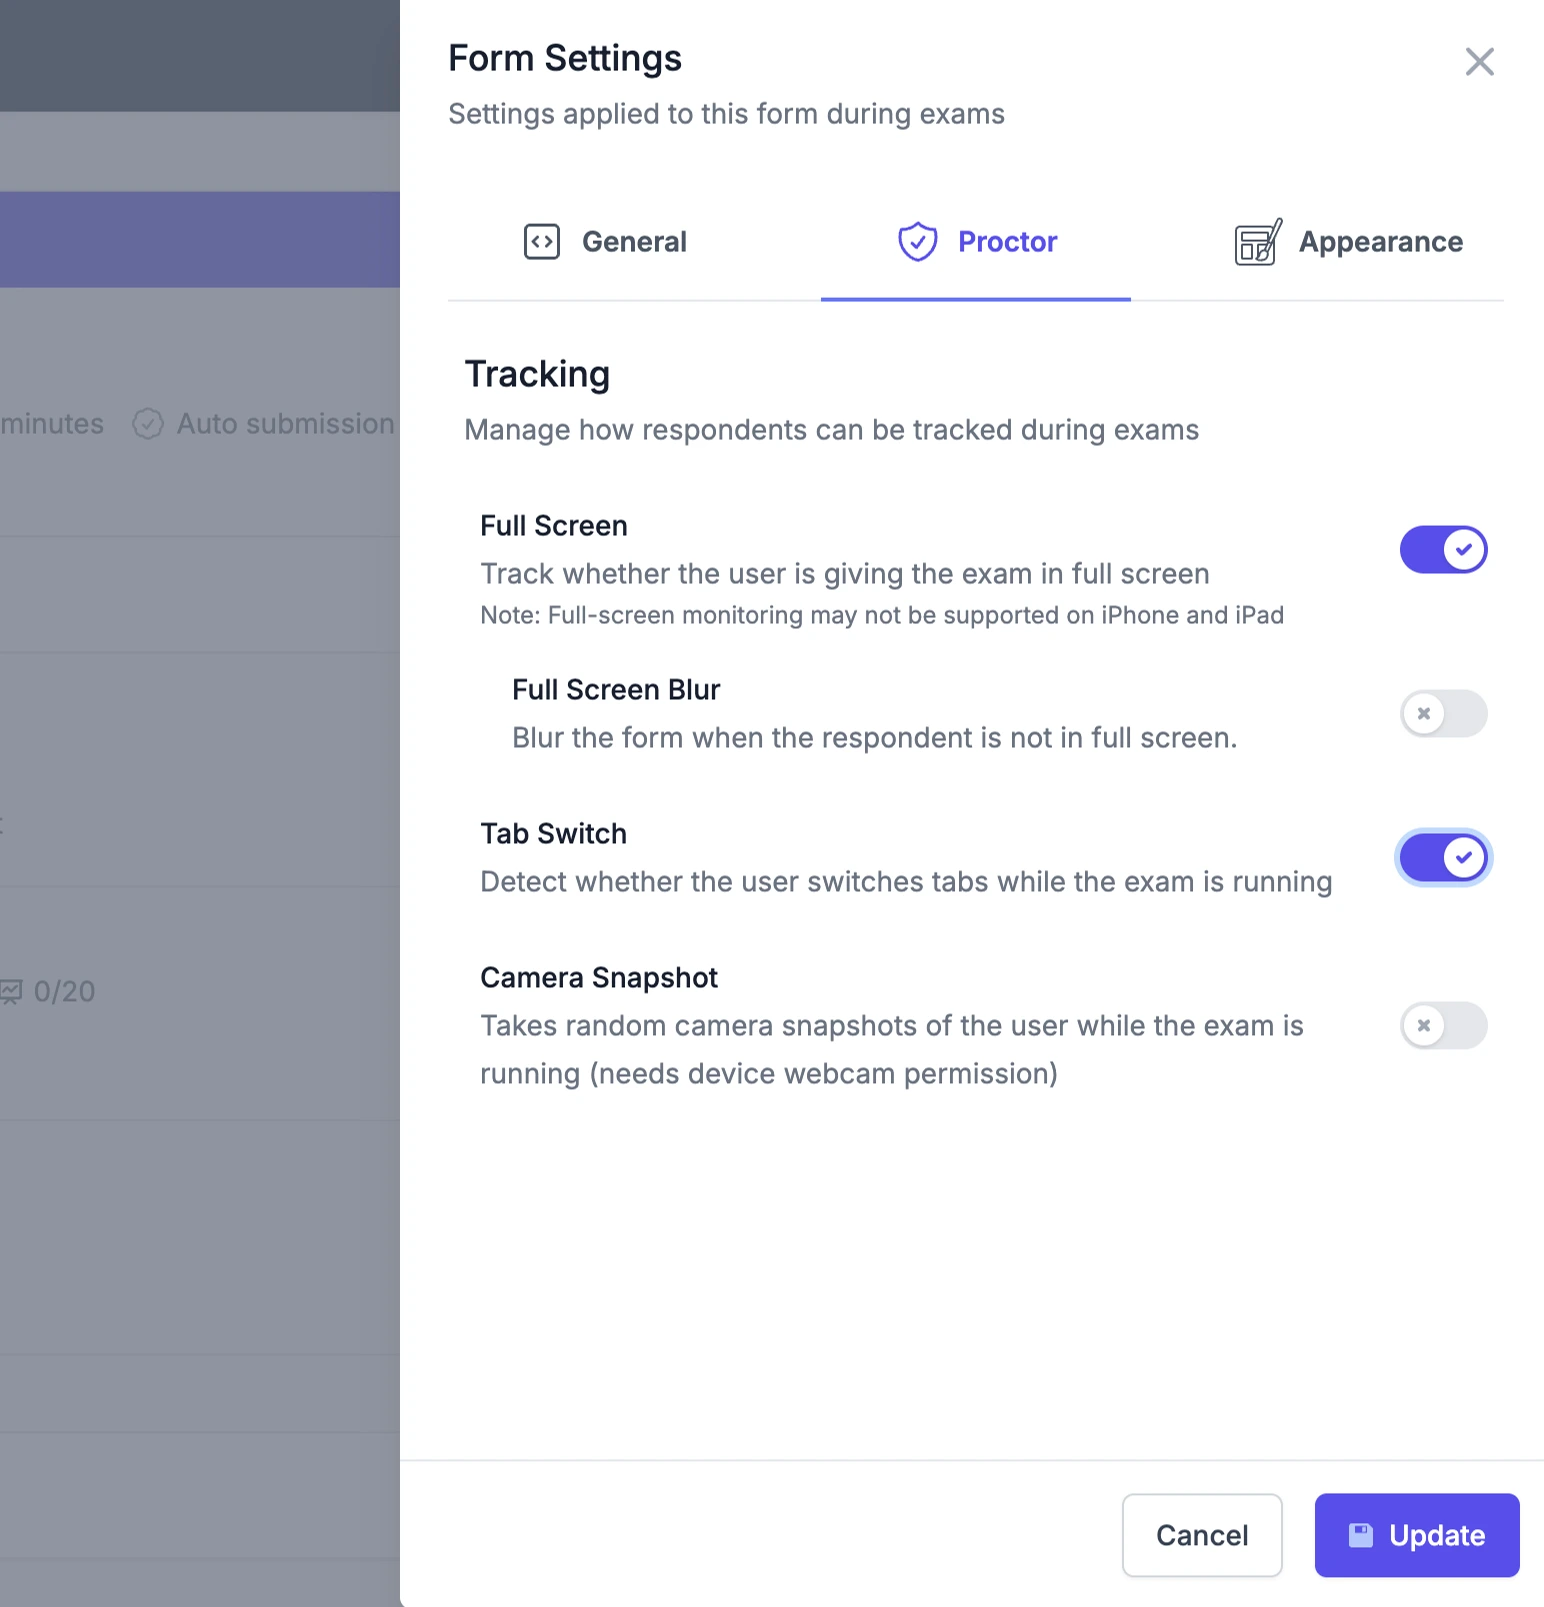
Next, there is the Proctor option that allows you to prevent cheating by configuring settings like;
- Full-Screen Tracking along with Full Screen Blur
- Tab Switching
- Camera Snapshots
In the Form Settings, you’ll also find the Appearance section which includes timer themes and their variants to choose from. You can also change the timer colors —— the timer bar color, timer bar background, and text colors.
You can customize the Form Navigation Menus Background Color to any desired RGB values. Also, the Body Background Color to any desired RGB values and the email text color in the form navigation.
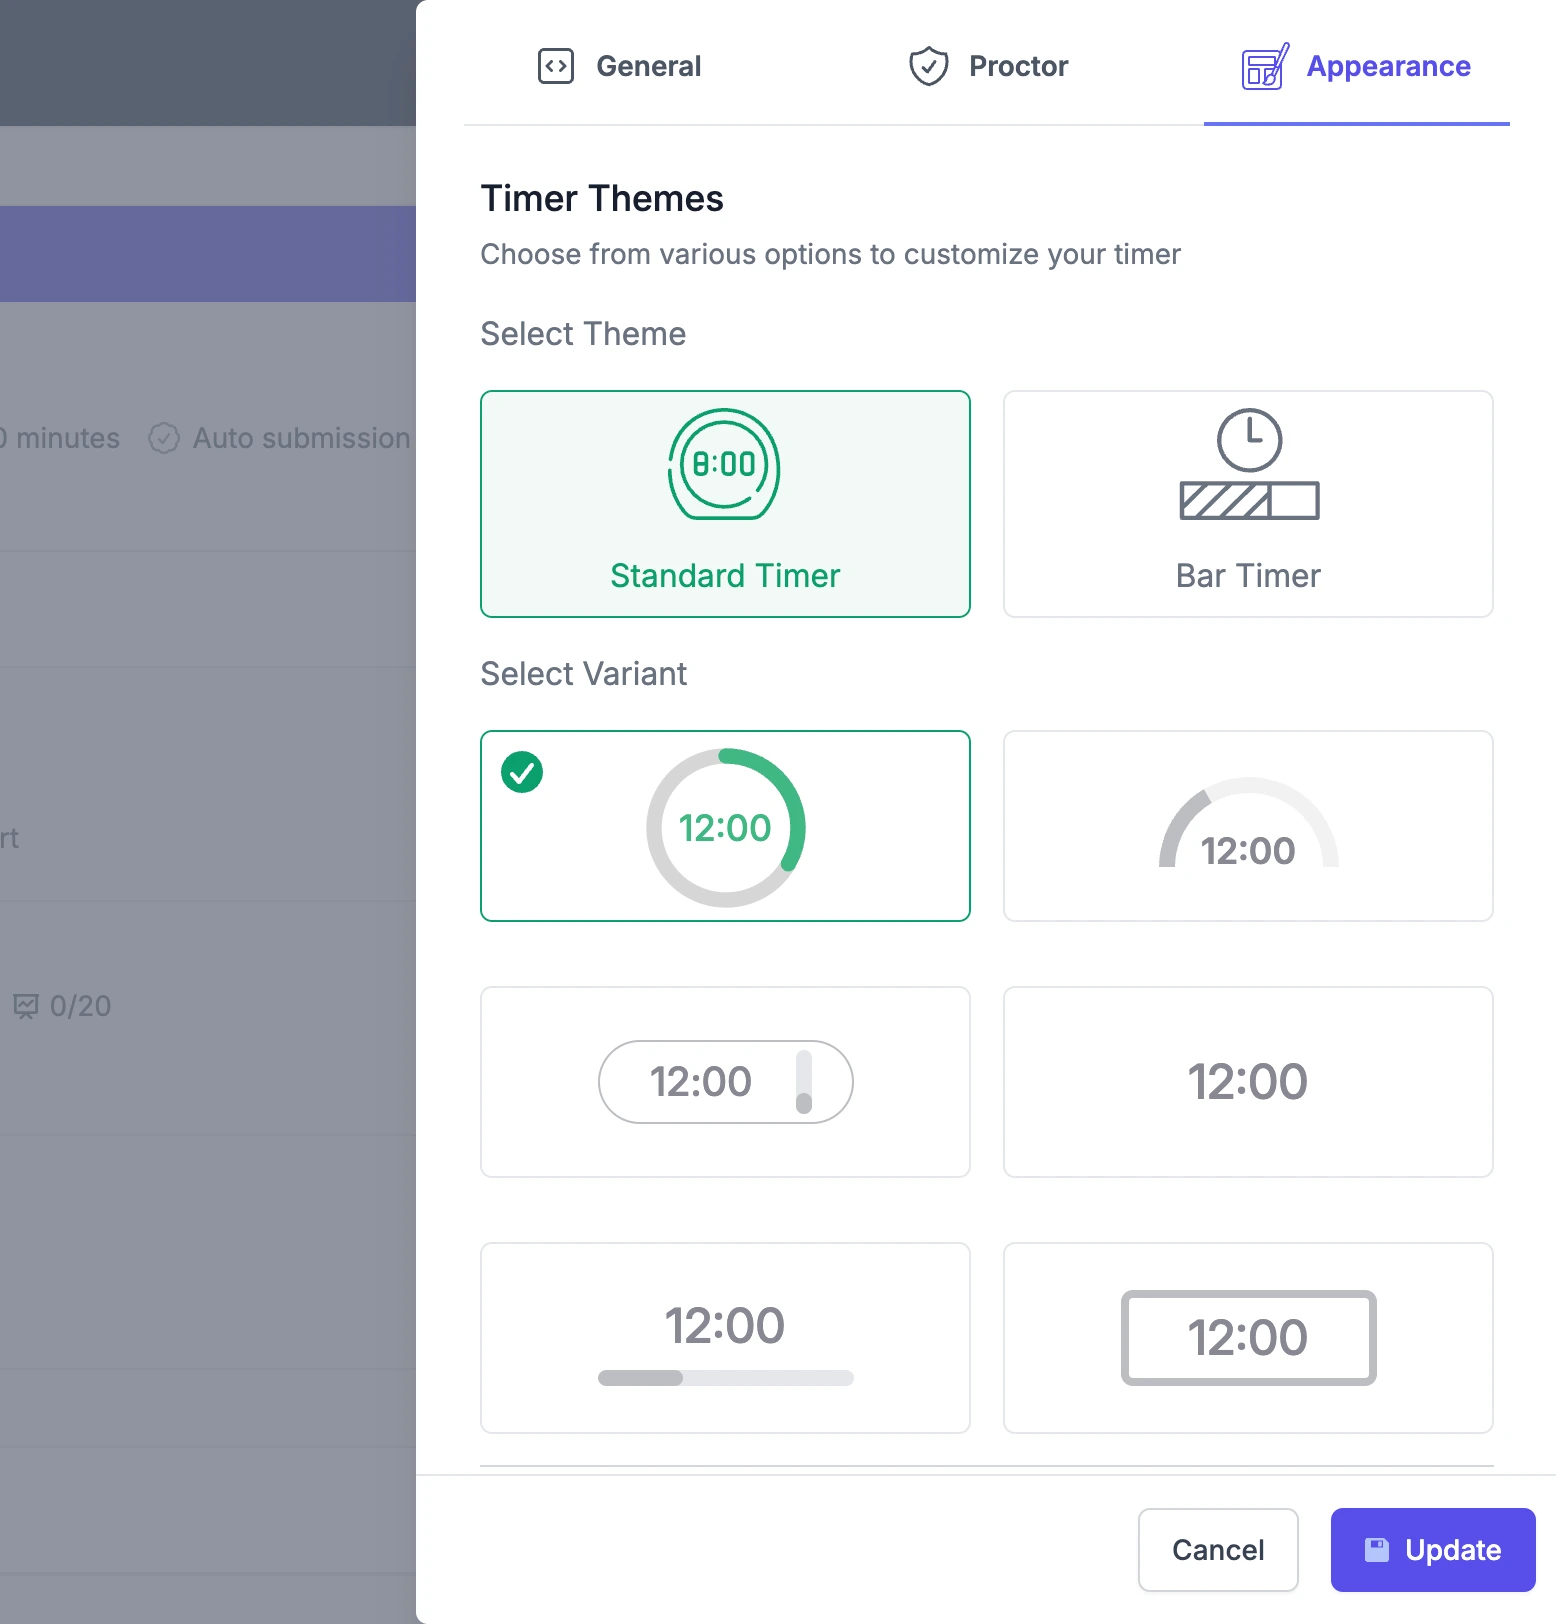
Don’t forget to hit the Save Button to save the made changes.
In the current Extended Form shown above, some settings have the following use:
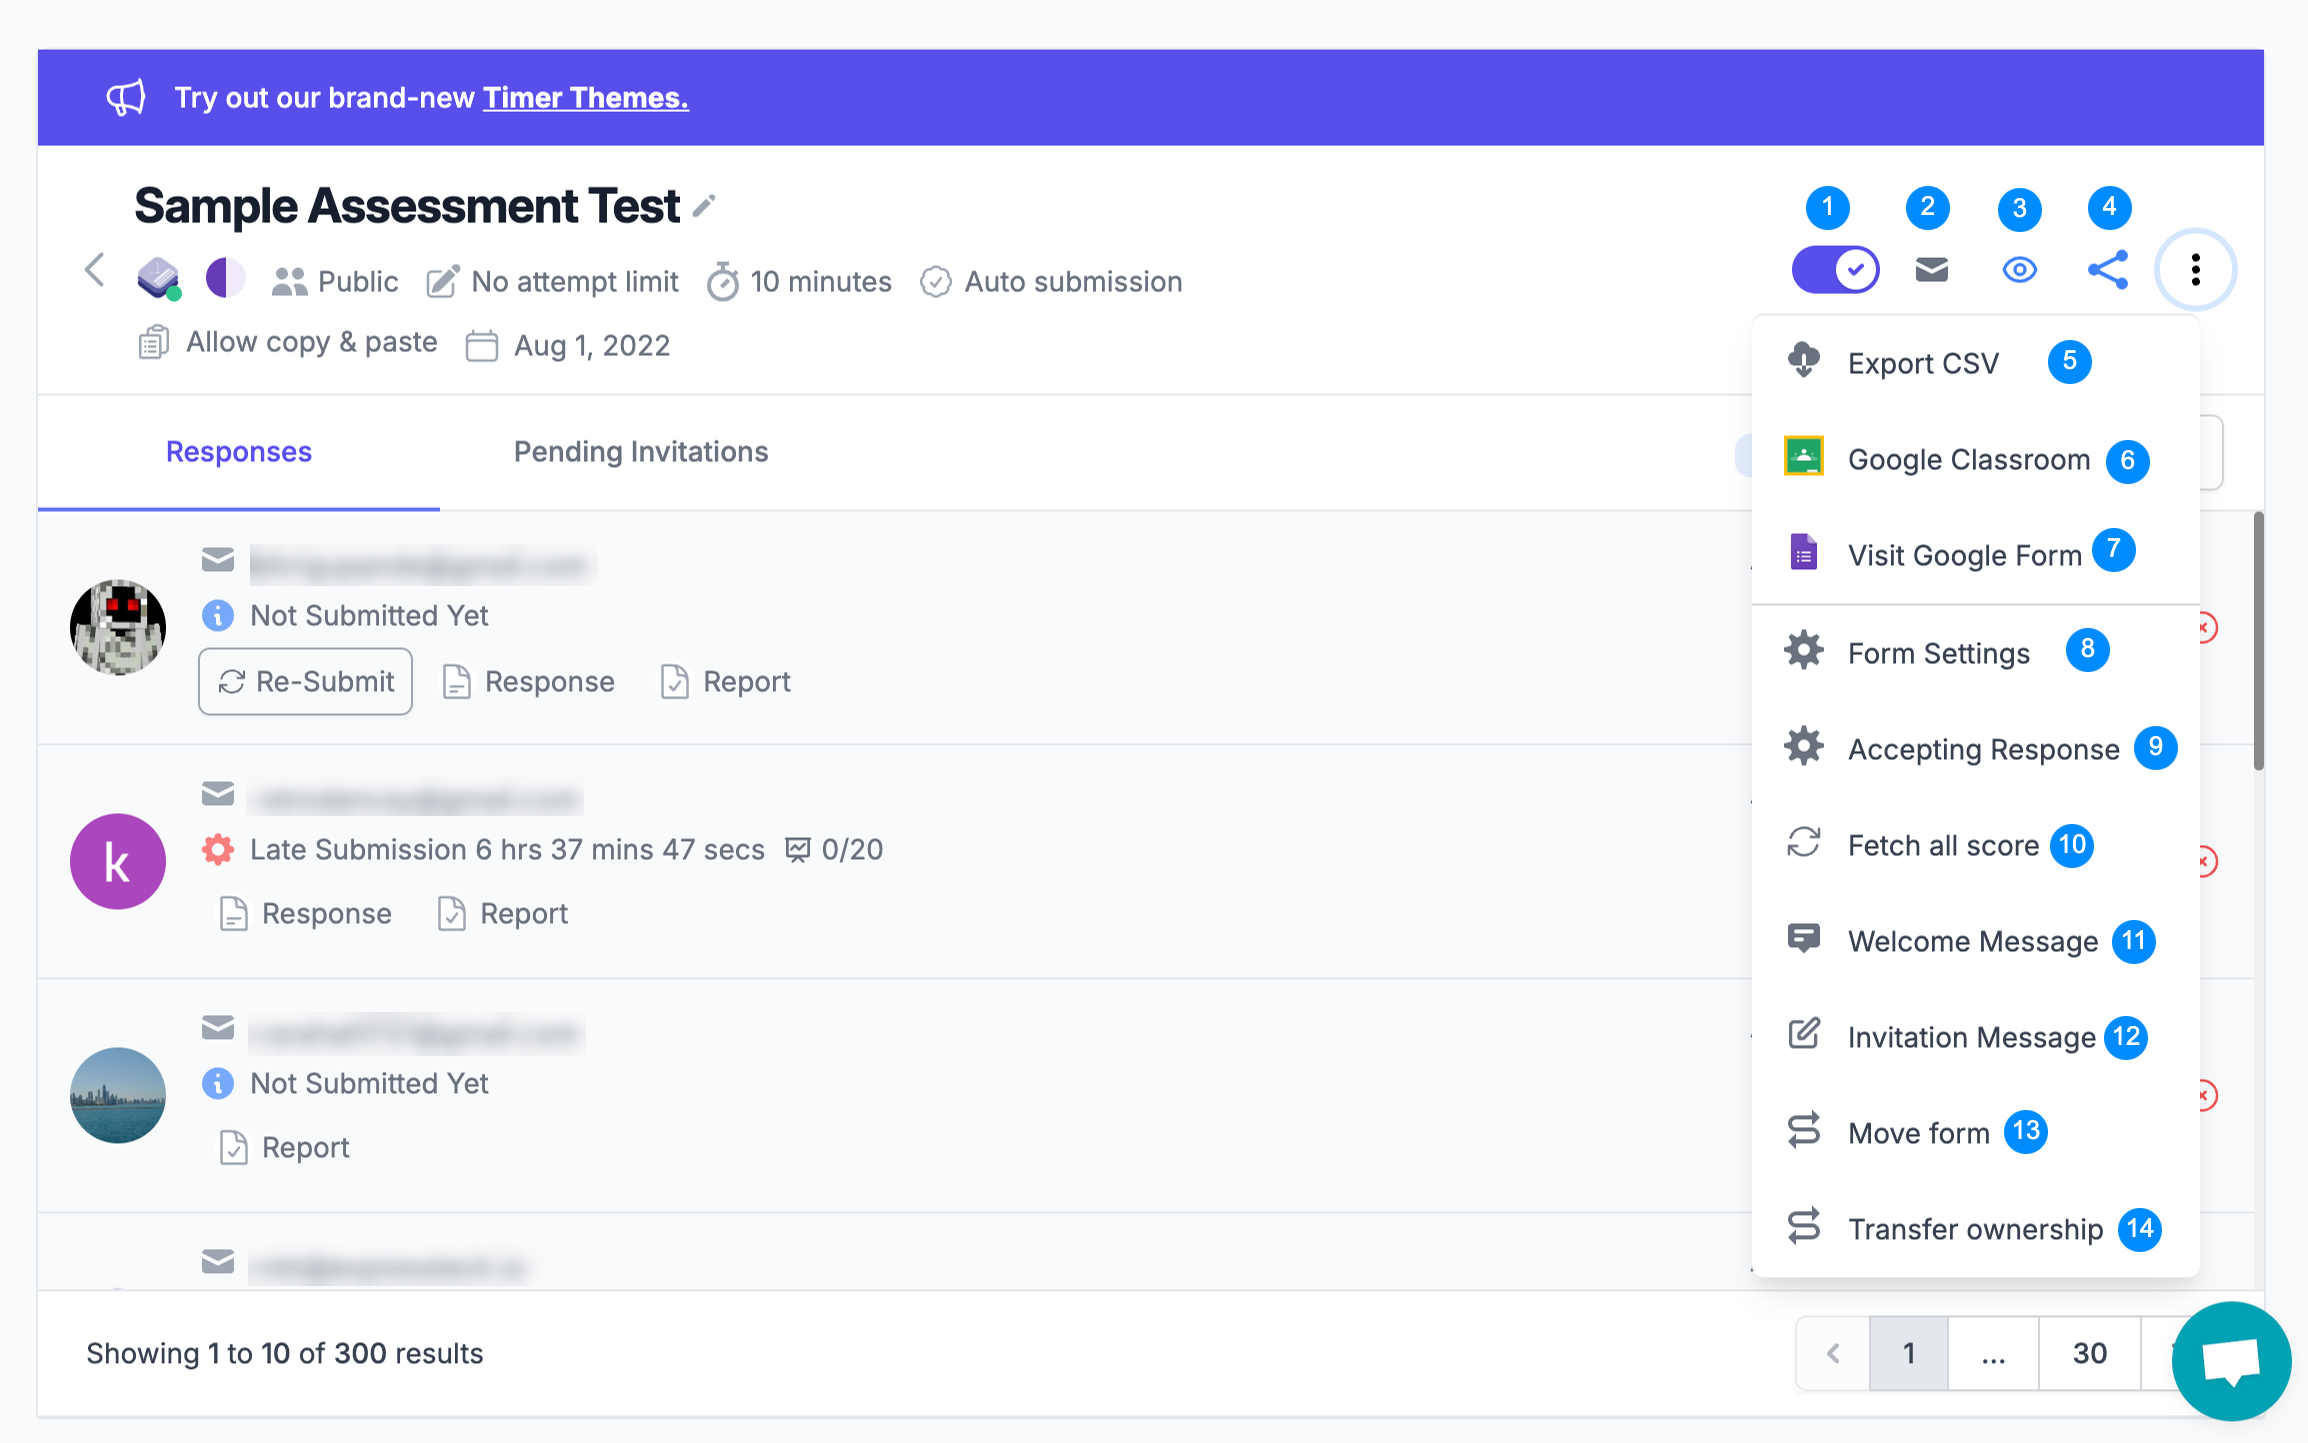
1. Accept Response
The Accept Response toggle button allows you to enable or disable Extended Forms’ ability to receive responses. When turned off the form becomes inactive, preventing any further submissions. This feature is useful in managing deadlines and ensuring no responses are accepted once the form is closed.
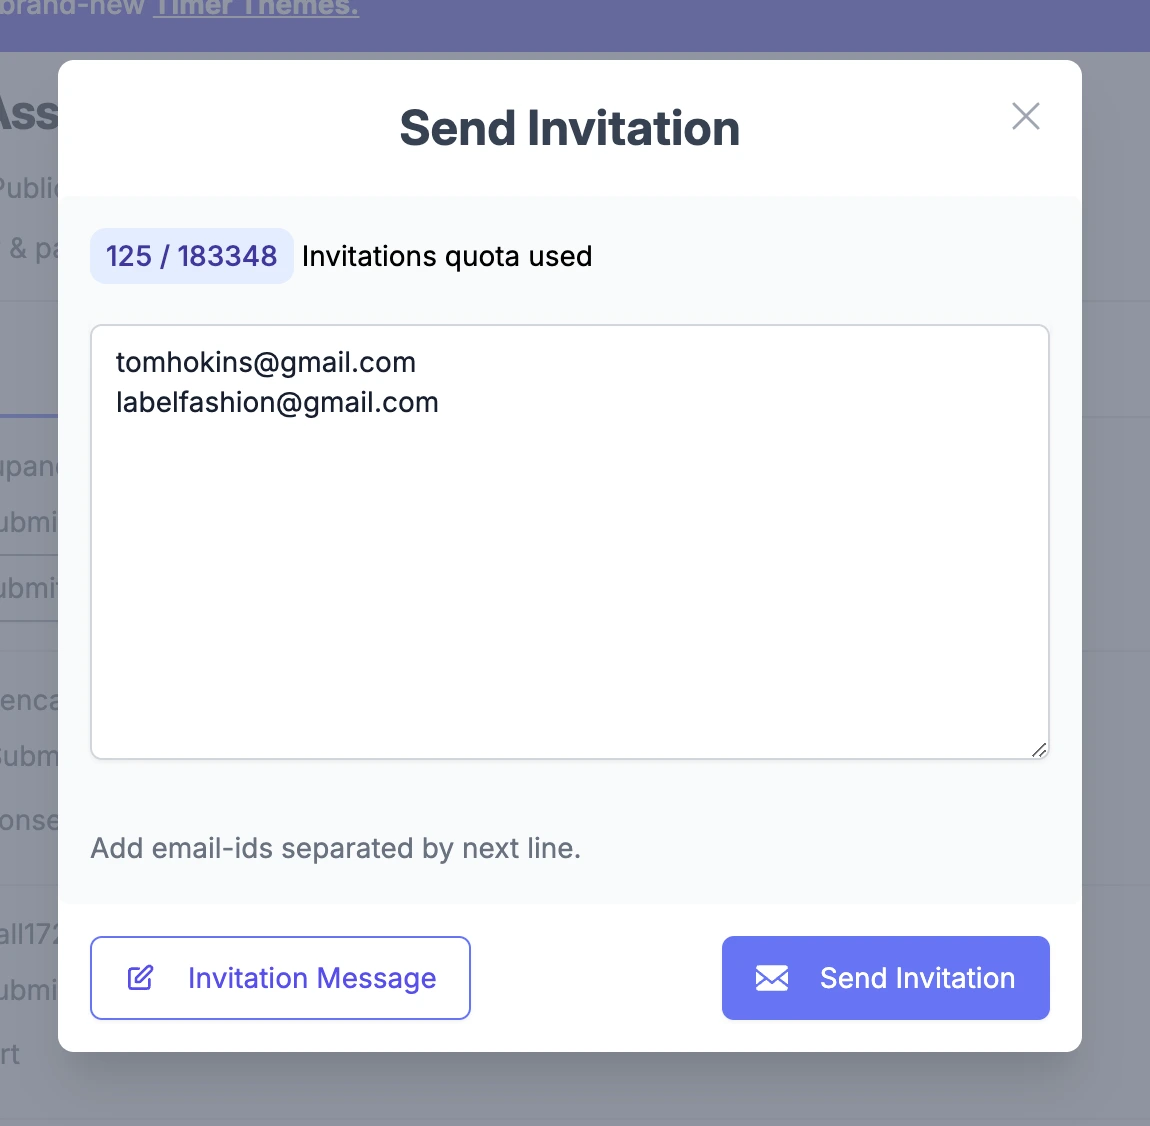
2. Send Invitation
This feature allows you to easily invite participants to complete the test or survey. This makes it convenient to share your form with specific individuals who need to take it.
3. Preview Form
It gives you a live preview of your newly created form, allowing you to see exactly how it will appear to respondents before sharing it.
4. Share Form Link
It allows you to easily copy the form link with a single click, enabling you to share it with potential respondents. You can also use the link as a hyperlink or button. Additionally, the feature offers options to shorten and customize the URL for easier sharing.
5. Export CSV
This feature enables you to export and download your form data or select specific fields and responses in a .CSV format. However, this feature is currently available only for users on a subscription plan and is not part of the free offering.
6. Google Classroom
It allows you to seamlessly sync with Google Classroom, making it easy to add classwork and assignments directly from Extended Forms. This integration simplifies managing student activities and assessments within a single platform.
7. Visit Google Form
Clicking on this option will open the Google Form that you’ve configured with Extended Form, allowing you to view or edit the form with the added functionalities.
8. Form Settings
It opens up the Form Settings tab (that we discussed in detail in the starting section of this article) with various form settings to configure your Google timer test.
9. Accepting Responses
This feature allows you to set a specific time and date range for accepting responses to your forms. Additionally, you can schedule reminders to be sent via email before the exams.
10. Fetch all score
The fetch-all score feature allows you to retrieve and view the scores of all respondents who completed the form
11. Welcome Message
Display a custom welcome message or instructions to the form respondents. This is a pro feature.
12. Invitation Message
The Invitation Message feature lets you customize a personalized invitation message, complete with a call-to-action button. This allows you to send a special invitation to participants you want to take the Google timer test. Note that this feature is available only for pro users.
13. Move Form
Move form allows form owner to transfer form within the same account between teams and personal accounts available.
Transfer Ownership
This function allows you to transfer ownership of the Extended Forms to another user who also has access to Extended Forms and has installed the add-on. The new owner can share their Extended Form Token to complete the transfer.
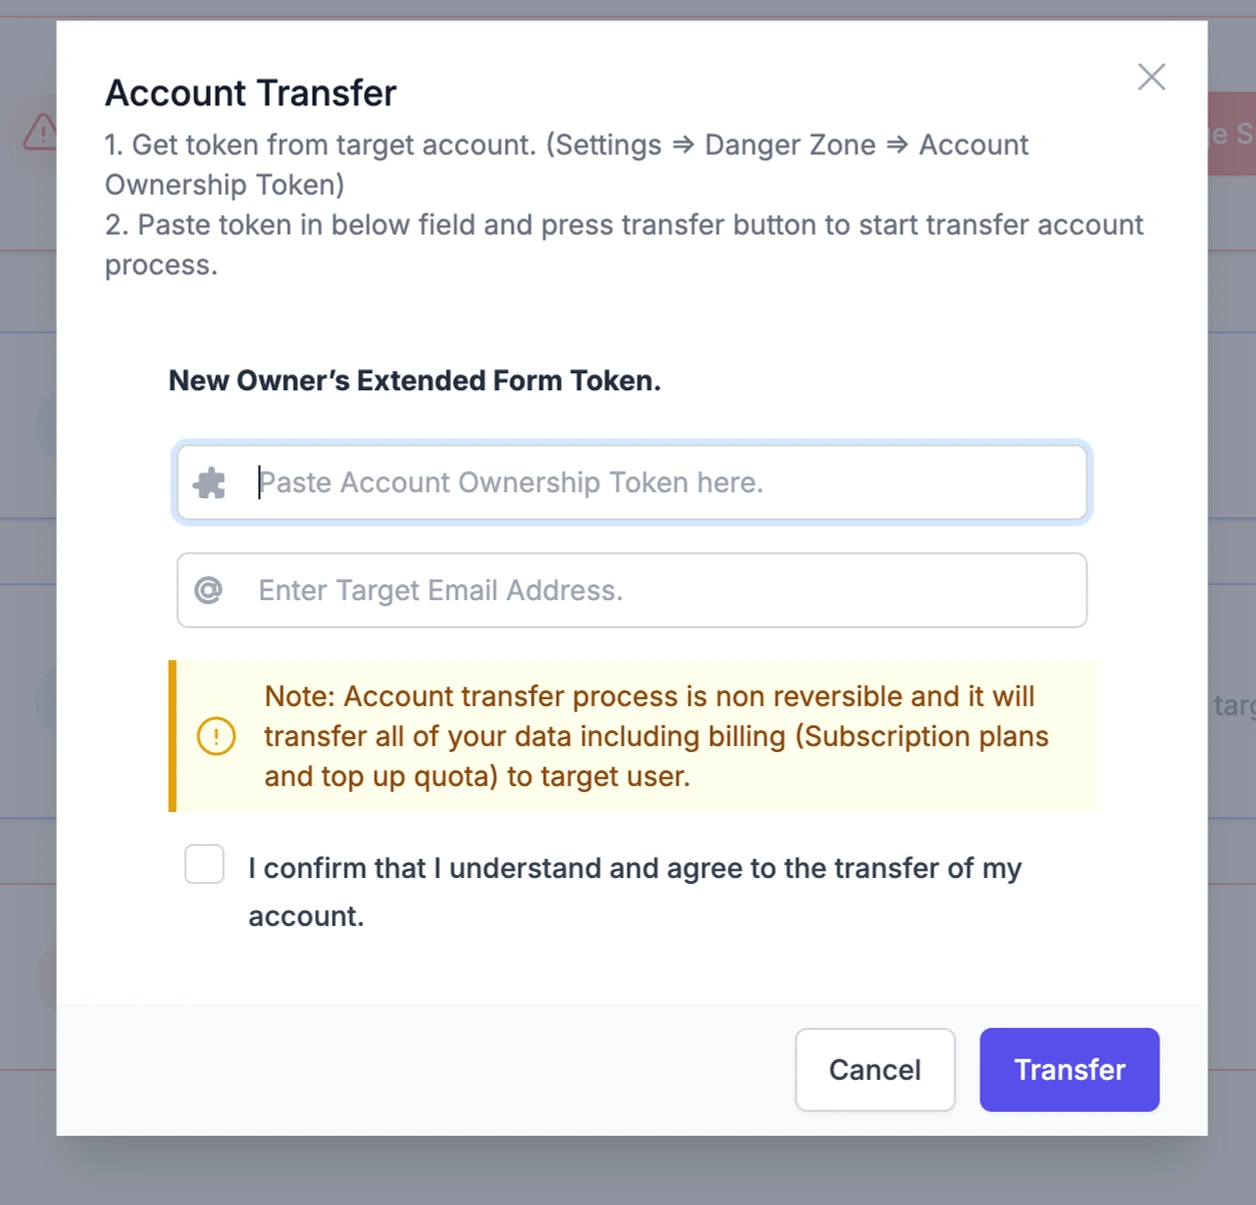
To find your token, navigate to the Extended Forms Dashboard > Settings > Danger. From there, copy the Account Ownership Token code, and paste it into the Transfer Account option to transfer the ownership to the designated token number.
Also Read, How to create Quizzes using Quiz Builder Plugin in WordPress?
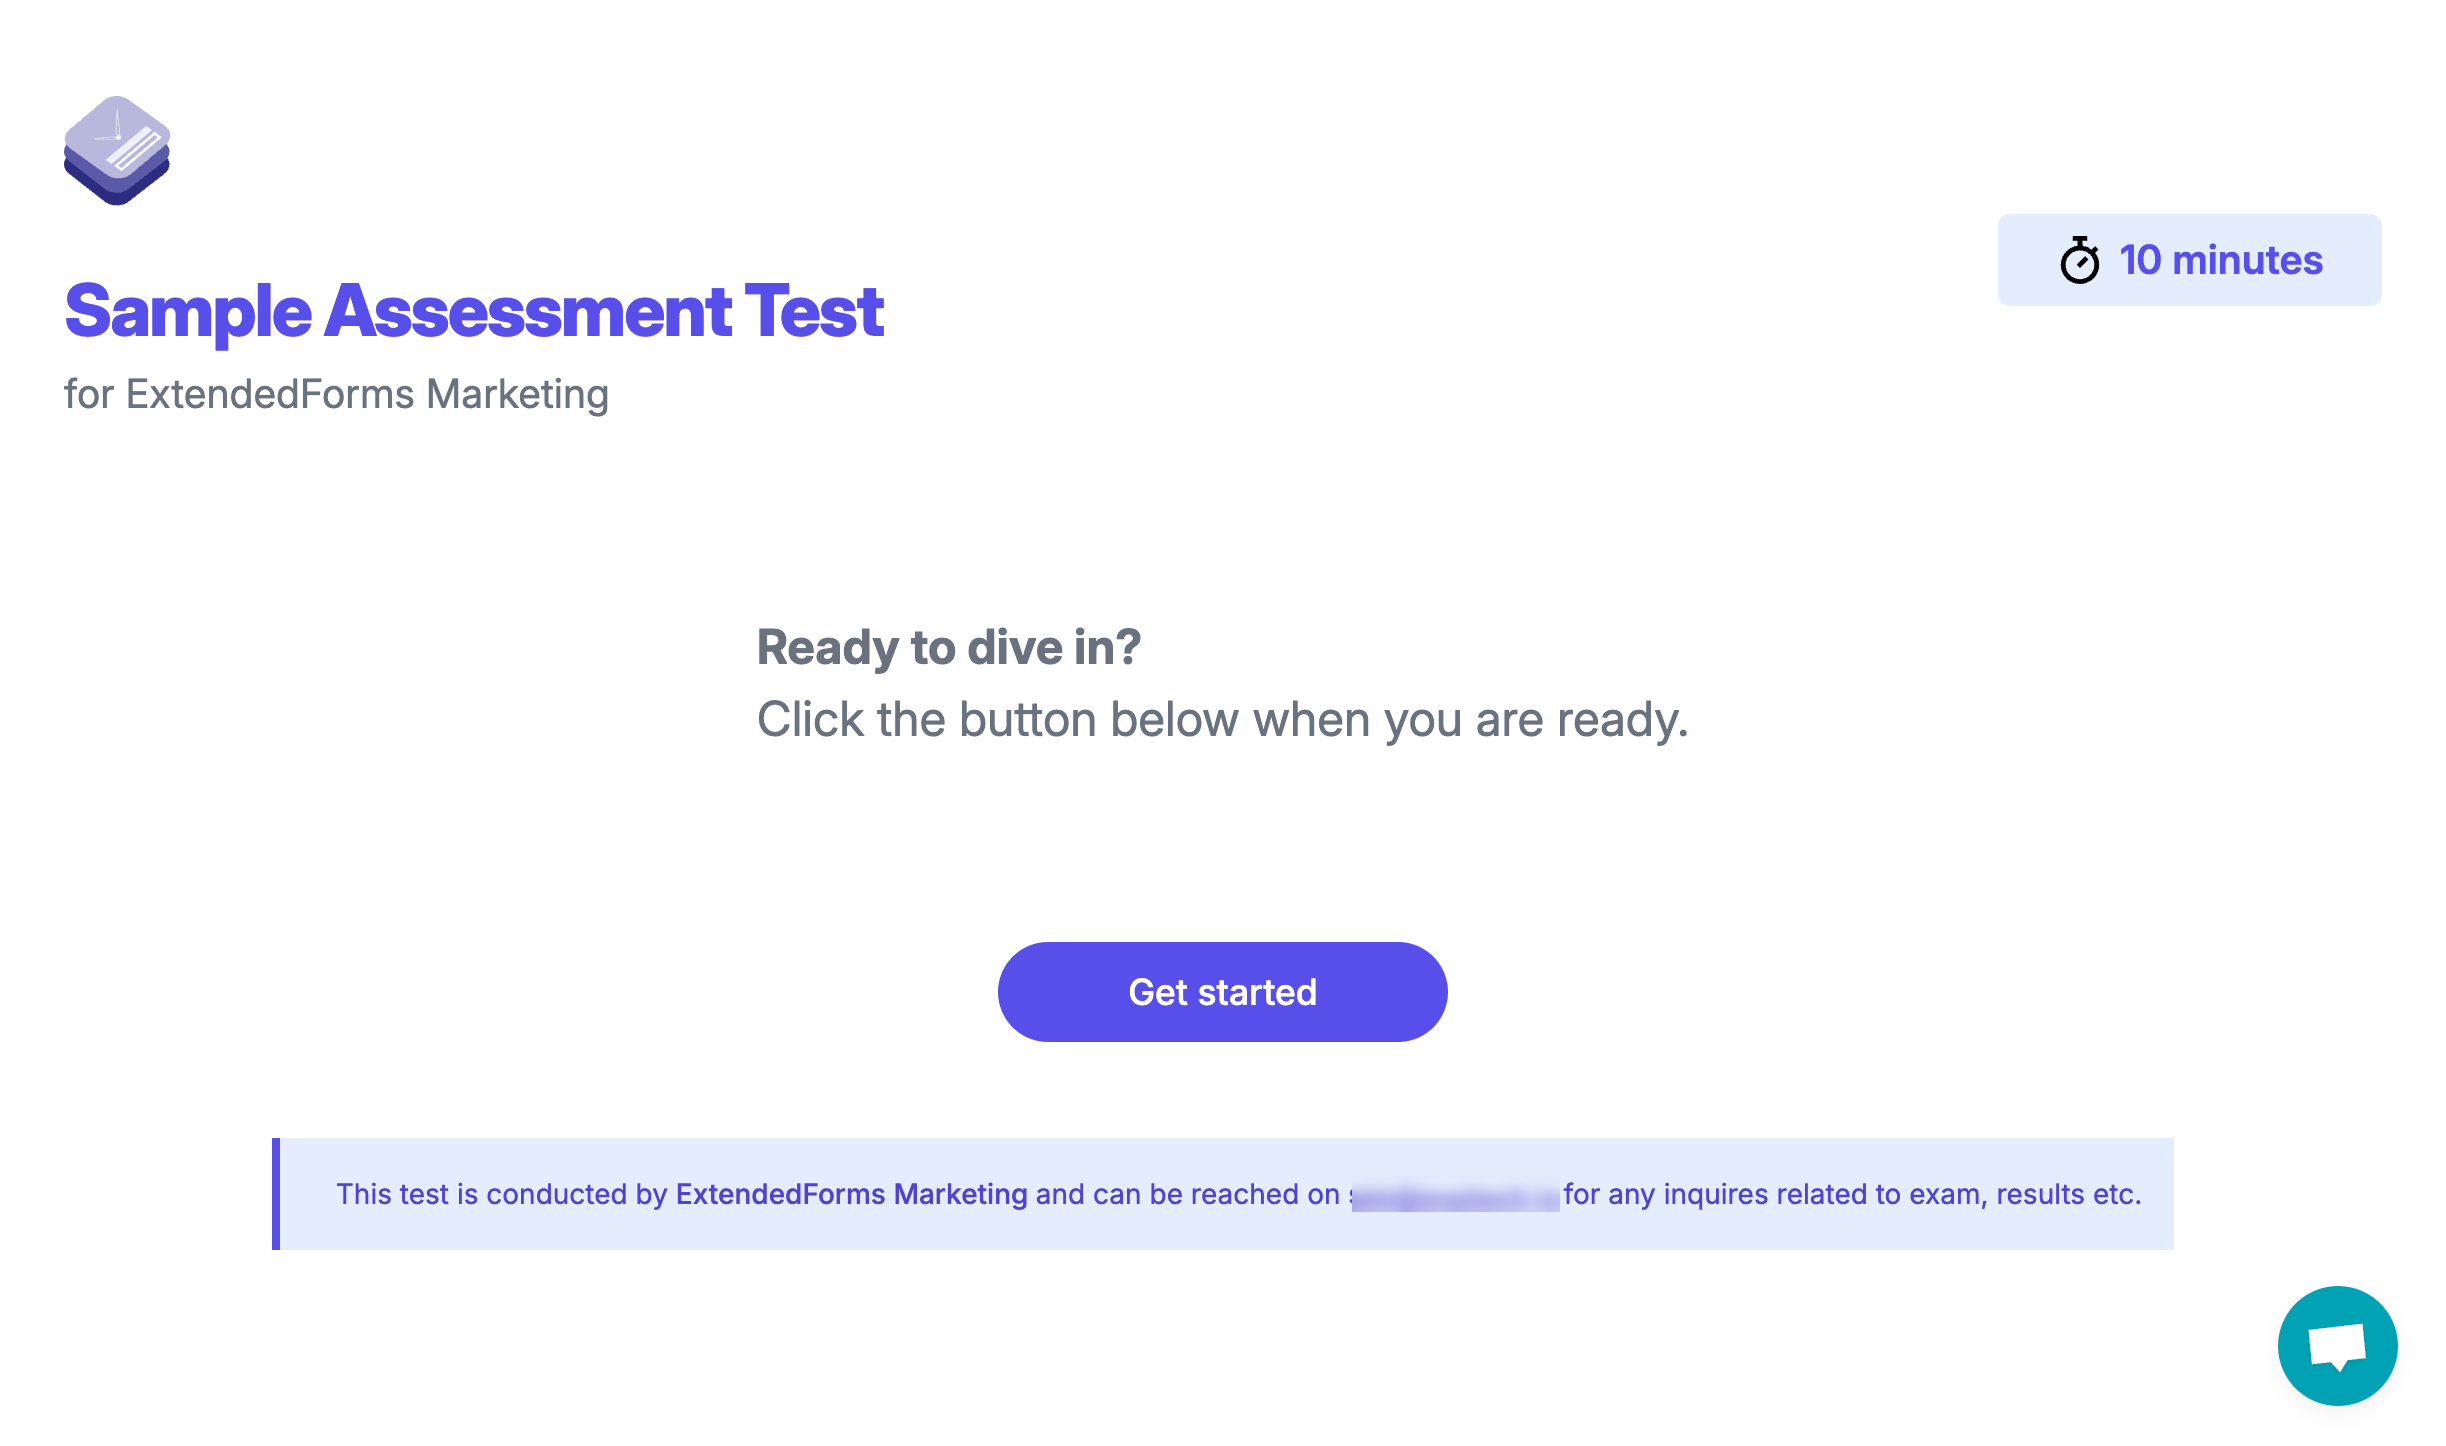
Below is the final output of the Google timer test we created using the Extended Forms Addon. Here’s the welcome page;
This is the Pre-Test information displayed to the user specifying the Name of the Test, the Name of the Responder, the Time Limit of the Test, and the Get Started Button to begin the online test.
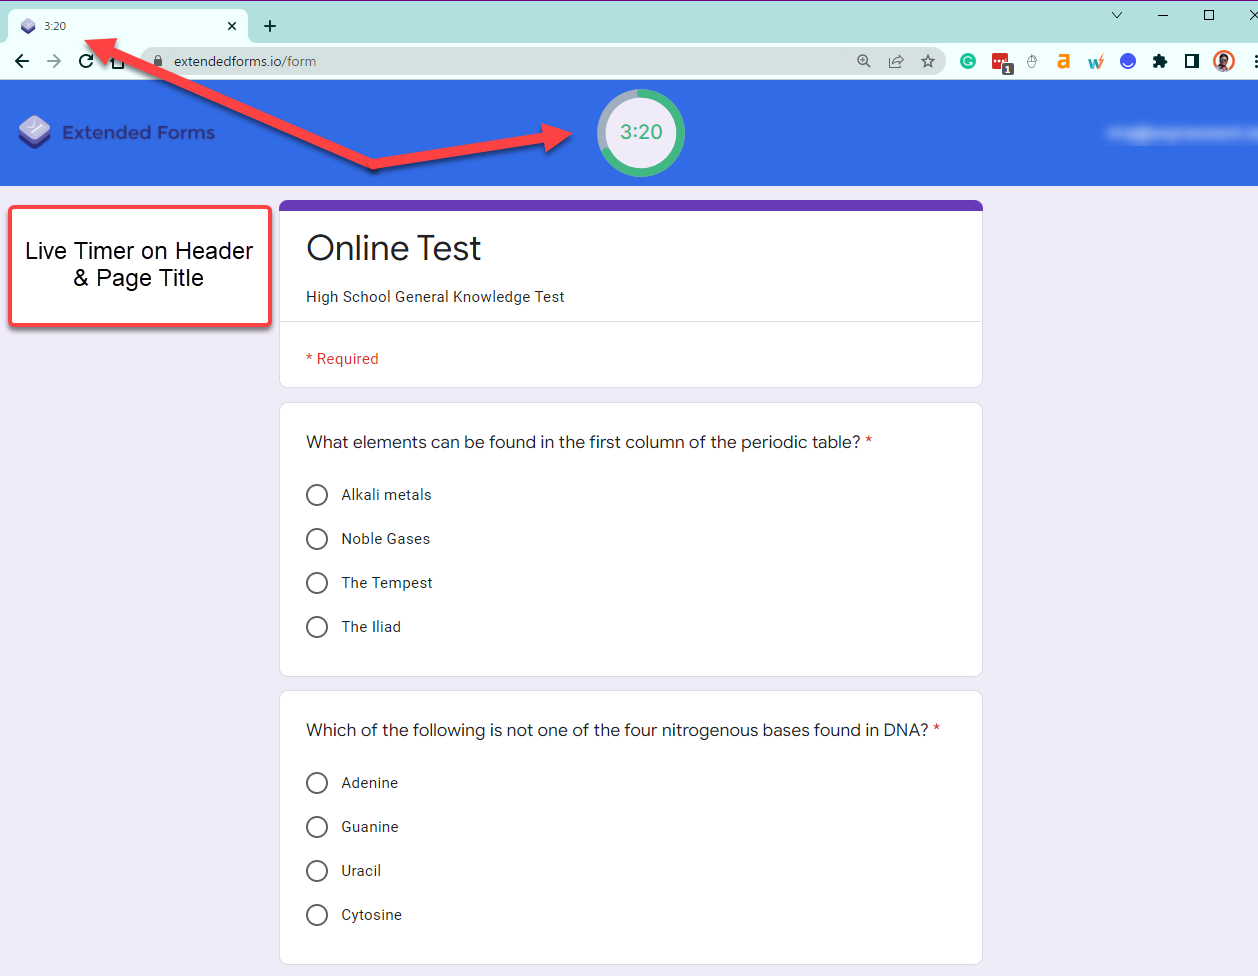
This image shows the Extended Forms in action with a Clock Timer at the center of the form nav bar notifying the time left for completing the form There’s a timer even on the Title Text of the active browser tab.
This image shows what happens after submitting the form. The responder is acknowledged with a Thank You message denoting that the response has been recorded.
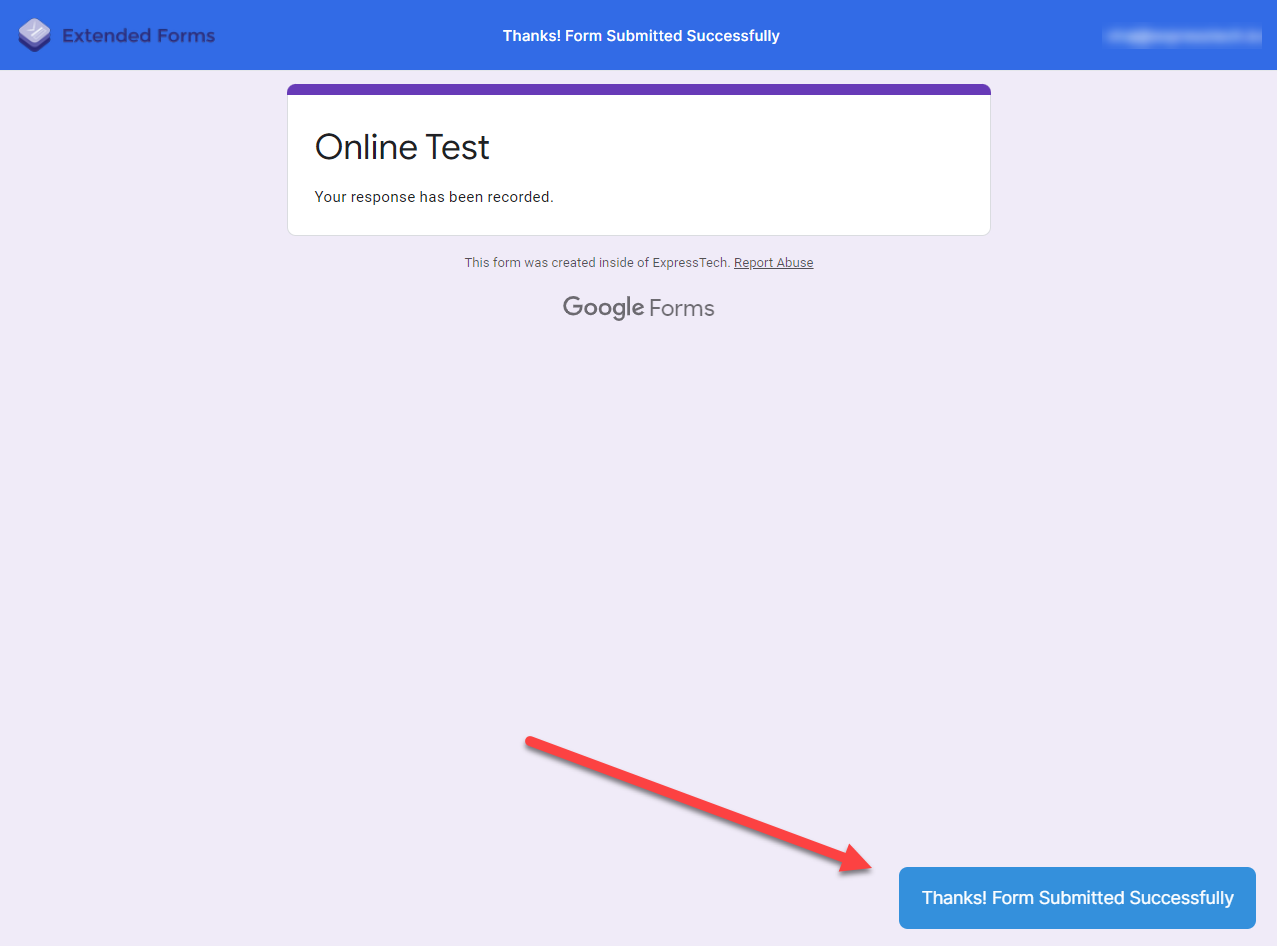
If you’ve enabled the “Auto-Submit after the timer ends” option while configuring the Extendedforms Addon, the form will auto-submit as soon as the timer ends.
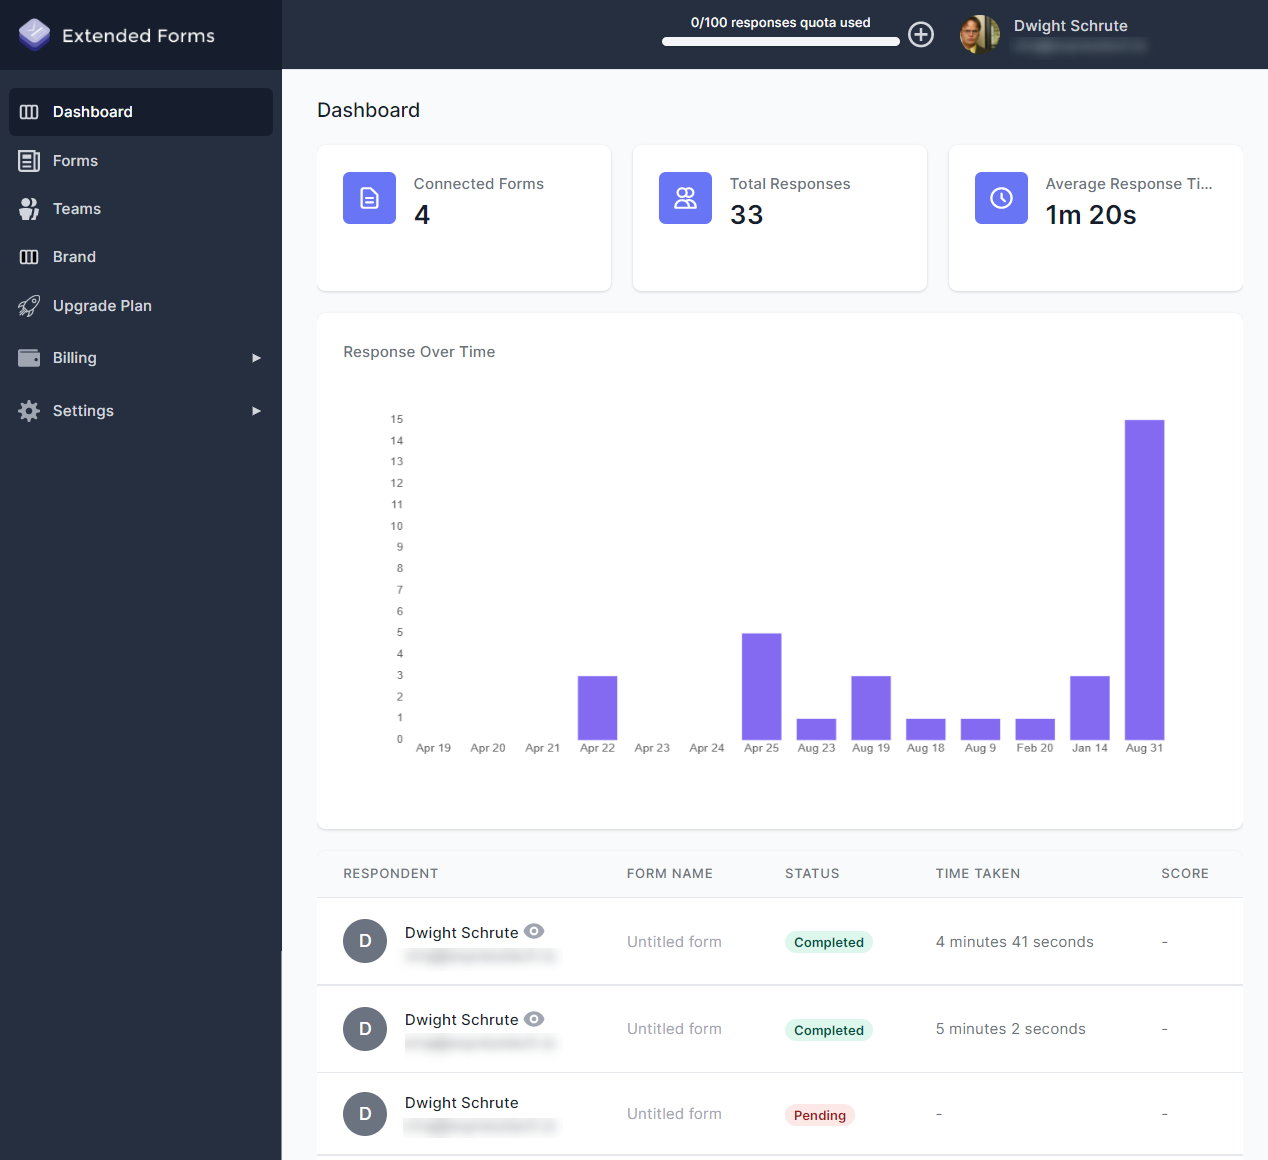
Extended Forms Dashboard provides you with a quick overview where you can see the last Recorded Responses from the Form Responders with their emails, the time taken to complete the test/form, and the score earned if any.
If you have doubts regarding how to configure Extended Forms or want to troubleshoot a few things you can find a resolution in the Extended Forms documentation.
Conclusion
So, this is how you add a timer for Google Forms and create Online Exams, tests, and feedback forms. Download the Extended Forms Addon, create exciting Google forms/online exams, and share your experience in the comment box below.
Looking to create an online exam for your WordPress website? With the Quiz and Survey Master Plugin, you can easily create an online exam, as well as other interactive forms like customer satisfaction surveys and personality quizzes — all for free.
Check out popular articles on Quiz and Survey Master to learn how to effectively engage your visitors on your WordPress site.
