The following guide will show you how to install the plugin, create a quiz/survey, add questions and answers, set up a contact form, add a pre-exam message, configure the quiz behavior, set up your results pages, style the quiz, and then adding your quiz to your post or page.
Watch this video to learn more about Quiz and Survey Master Plugin
Installing the Plugin
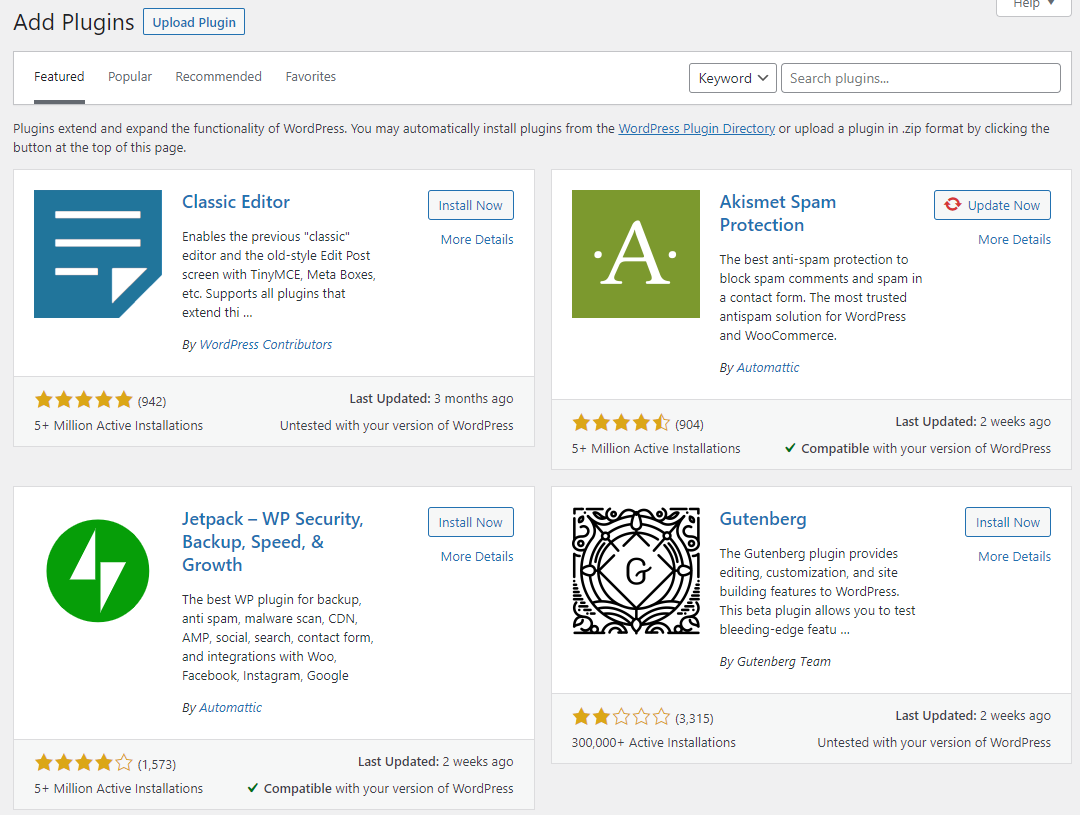
- Click on the “Plugins” option in the admin panel.
- Click “Add New” at the top and search for QSM or Quiz And Survey Master.
- Once the plugin is installed you should see an option in the admin panel called “QSM”.
Creating a Quiz or Survey
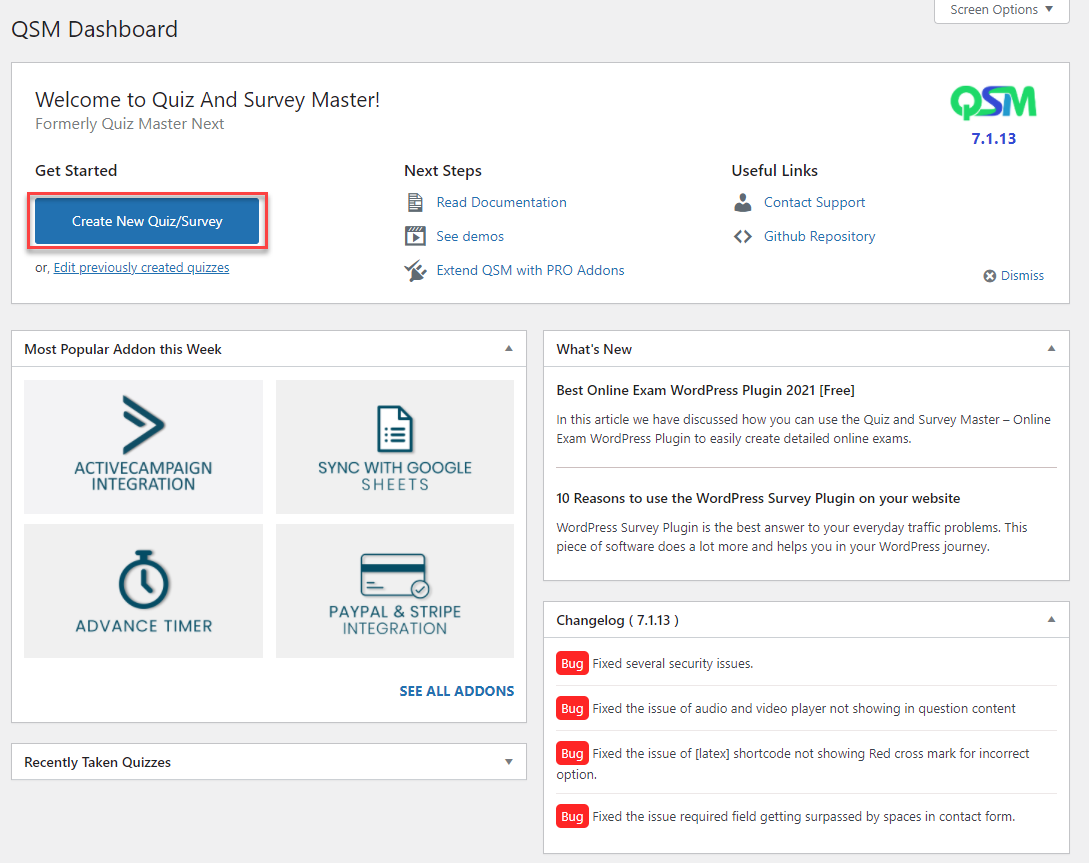
Once you’ve installed the plugin navigate to the QSM Dashboard. On the dashboard, you will see a lot of information regarding the plugin like a Button for Creating a New Quiz/Survey, Editing Previously built Quizzes, Support Information, Useful Links, QSM Update Changelog, Latest Blog Articles, Popular Addons, and more such information.
- Click the button in the QSM Dashboard called “Create New Quiz/Survey“.
- This will open up a Templates Window with various pre-built Quiz and Survey Templates or an option to start from scratch.
- Enter the Quiz Name in the blank field, Select any of the Templates, Specify the Quiz Settings like the Form Type, Graded System or Require User Login option and hit the “Create Quiz” Button.
For further information, please consult our complete documentation on creating a quiz here.
Creating Questions
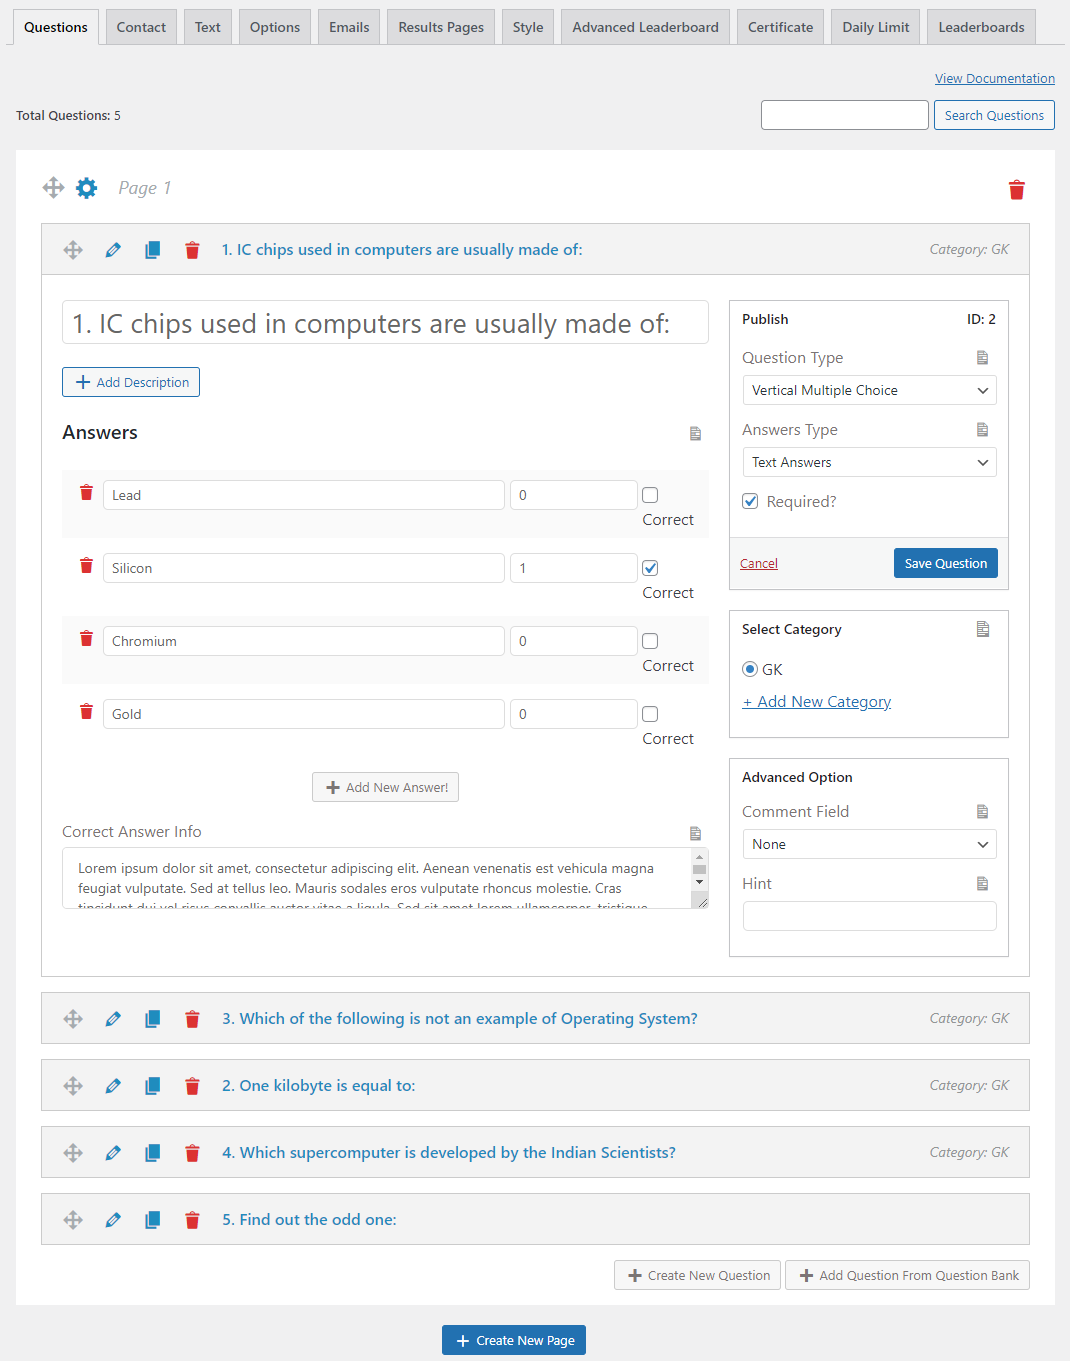
Step 1: Starting with Page 1 you need to type your question in the blank field that says “Type your question here“. If the question you’re asking has a supporting question that is more descriptive you can add it by hitting the add description button.
For Example: If you are a teacher you can build a comprehension question where the students can answer the questions based on the asked passage.
Your question may be in the form of images, videos, audio, files, or plain simple text.
Step 2: Quiz and Survey Master has 15 Question Types and we adding more with every major release. Do check them all, by default Vertical Multiple Choice is selected.
You also can choose from different Answer Types like Text Answers and Rich Answers. You need to mark a question as required if you want the question to be answered and not skipped by the respondents.
Step 3: After adding the question you can now add the answers. Depending on the Question Type you choose the answers list will also vary. Besides every answer, there are blank fields to allot points and also mark the correct answer. This helps later in calculating the points earned and review the number of correct answers when the respondent submits the exam and sees the result.
So, to keep it simple we are just going with the Vertical Multiple Choice Question Type. You can however check out all the Question Types and experience their working.
Adding Correct Answer Info: With the Correct Answer info, you explain to the respondent why the correct answer is the correct answer.
Step 4: Adding New Category, Categorize each question as it becomes better to identify the type of question being asked and can be later randomized when published with regards to the category it belongs to.
You can even let the respondents share Comments on the asked question or help them crack the question with a provided Hint.
This way you can create multiple questions of various different question types and add them into multiple pages to create a long or short Quiz/Survey as required.
After making the required changes don’t forget to hit the Save Changes button.
For further information, please consult our complete documentation on setting-up the questions in the Question Tab here.
Creating a Contact Form
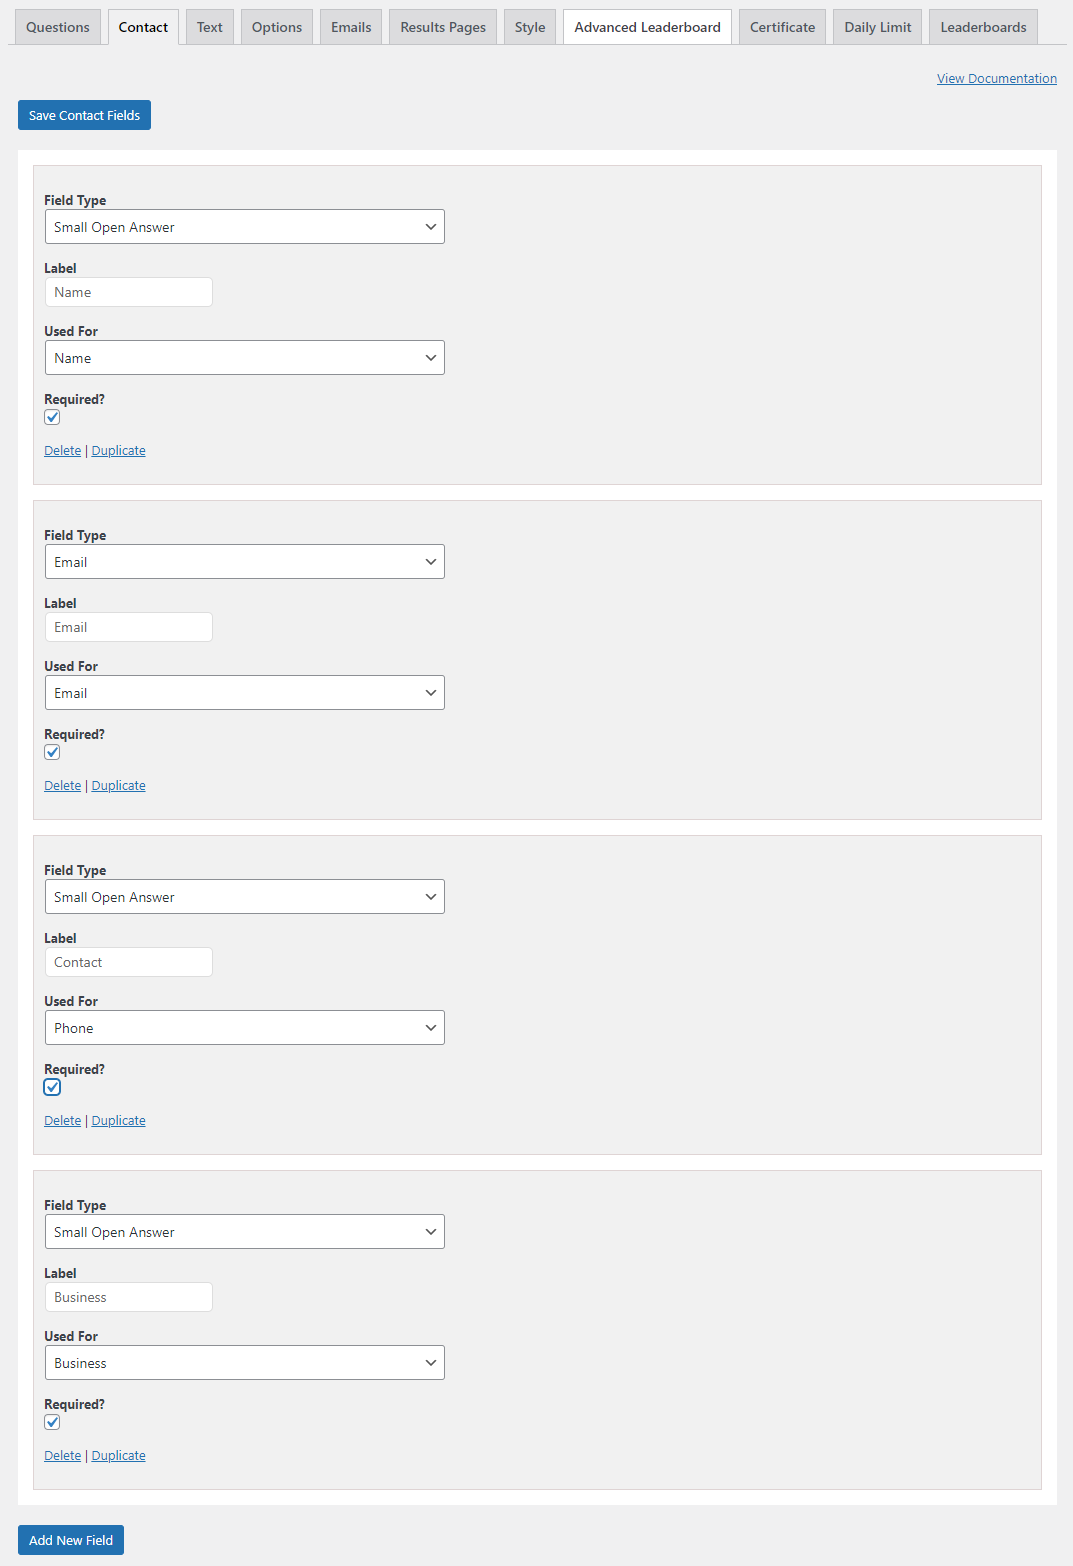
To collect the respondent’s name and other information we can configure a form that the respondents need to fill before or after the Quiz/Survey.
The for can collect the respondent’s Name, Email, Contact, Business, Phone, Id, Class, etc., or any other related information that is needed to be filled by the respondents.
For accepting Names, In the Field Type choose Small Open Answer, Give it a Label, and select Name in the Used For dropdown. Also, if the information needs to be strictly filled then make sure you tick the required checkbox.
Subsequently for Email, Business, Phone you need to choose the relatable Used For option.
For ID, Class, etc. everything remains the same except No need to select the Used For field, keep it as it is as seen in the above image. Hit the Save Contact Fields button to save the changes.
For further information, please consult our complete documentation on setting up the contact form in Contact Tab here.
Message to Display before/after the Quiz
Here you can display a custom message that will be displayed as soon as the respondent clicks on the exam link or before the exam commences.
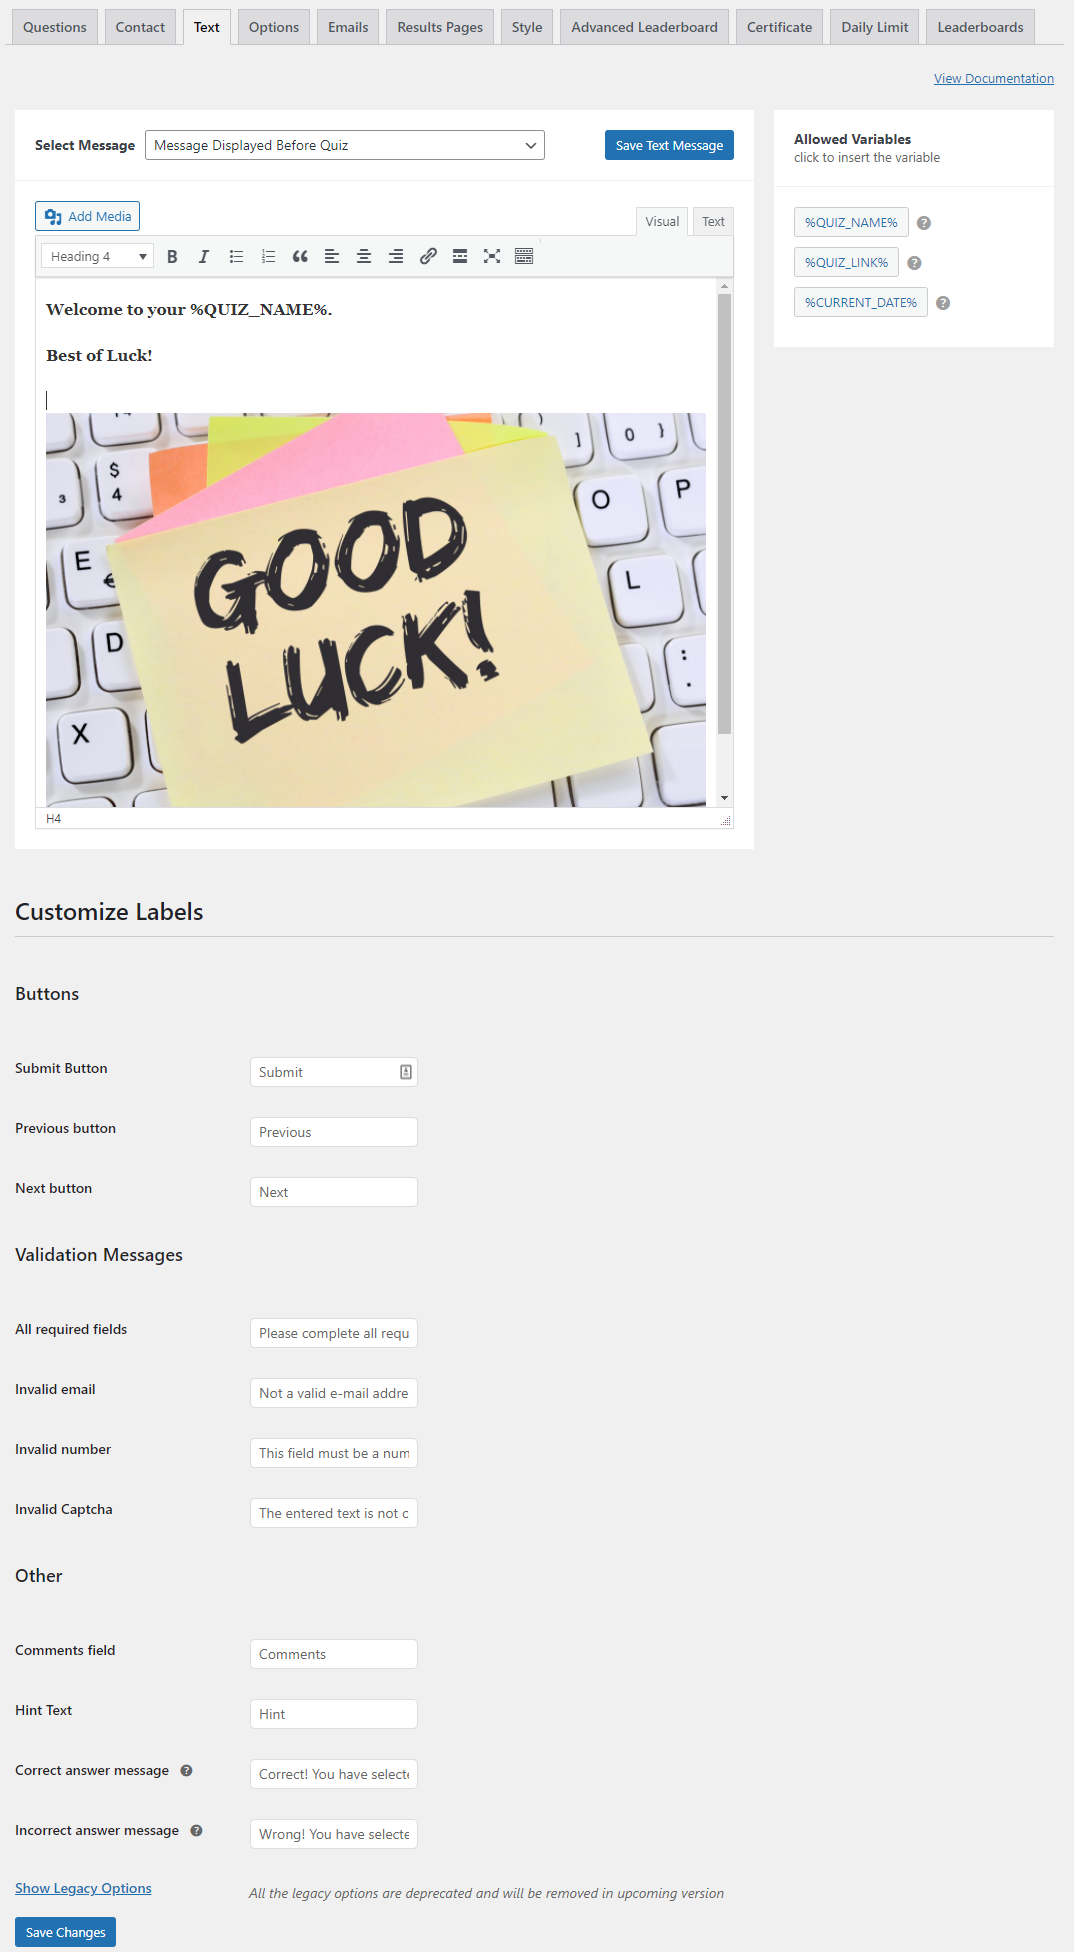
Here are many of the messages that can be displayed or altered as you like:
- Message Displayed Before Quiz
- Message Displayed Before Comments Box If Enabled
- Message Displayed At End Of Quiz (Leave Blank To Omit Text Section)
- Message Displayed If User Has Tried Quiz Too Many Times Message
- Displayed If User Is Not Logged In And Quiz Requires Users To Be
- Logged In Message Displayed If Date Is Outside Scheduled Timeframe
- Message Displayed If The Limit Of Total Entries Has Been Reached
- Results Page %QUESTIONS_ANSWERS% Text
- %QUESTIONS_ANSWERS_EMAIL% Text Twitter Sharing Text Facebook Sharing Text
For further information, please consult our complete documentation on displaying messages here.
Configuring Quiz/Survey with Other Options

Here you can configure the actual Quiz/Survey working. Some of the options like the Quiz Type, Time Limit, etc. might have already been configured at the initial stage itself when you selected the preferred template.
You can configure and add things like:
- Progress bar
- Questions per page
- Force Exam submit after timer expiry
- Limit the number of user attempts
- Limit the total number of entries
- Limit number of Questions to display
- Set Exam Live Date and Time
- Make Questions appear randomly
- Make Questions appear randomly only from the chosen category
- Show question numbers
- Save Responses permanently in a database, and much more.
For further information, please consult our complete documentation on the quiz and survey master options tab here.
Setting-up Emails
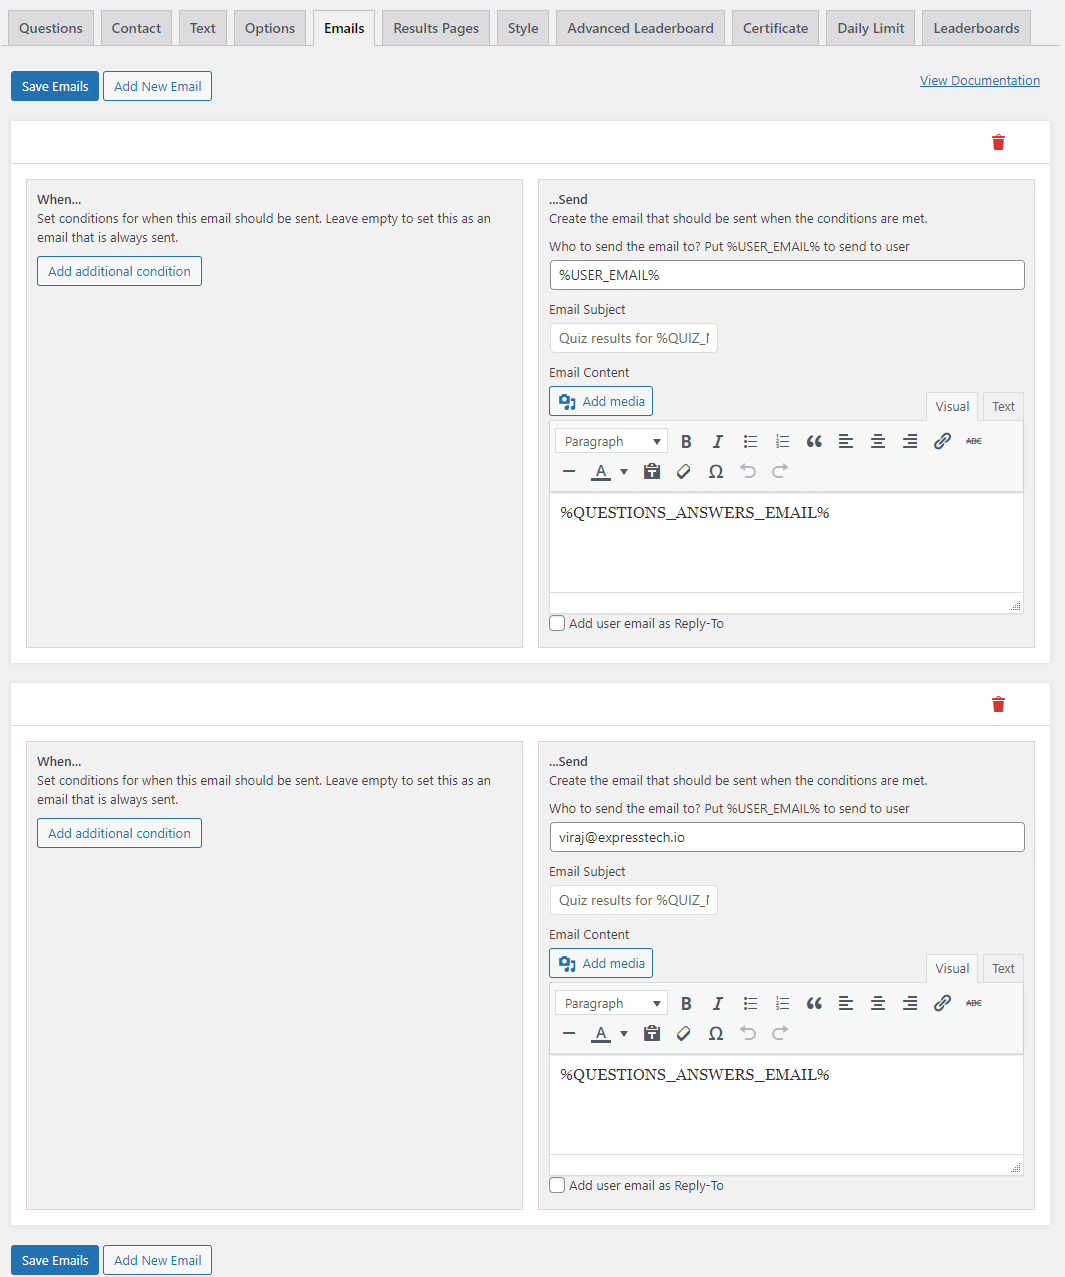
You can send emails to respondents after they’ve finished submitting the exam, reminding them of the answers they gave to the questions, the points they won, the number of correct answers, or simply letting them know that they’ve submitted/appeared for the exam.
You can add an additional conditions for emails to be sent. And send customized emails to every respondent depending upon the points earned or score received.
For this, you can make use of the various template variables that make this task a lot easy and quick.
For further information, please consult our complete documentation on setting up emails here.
Setting-up the Results Page
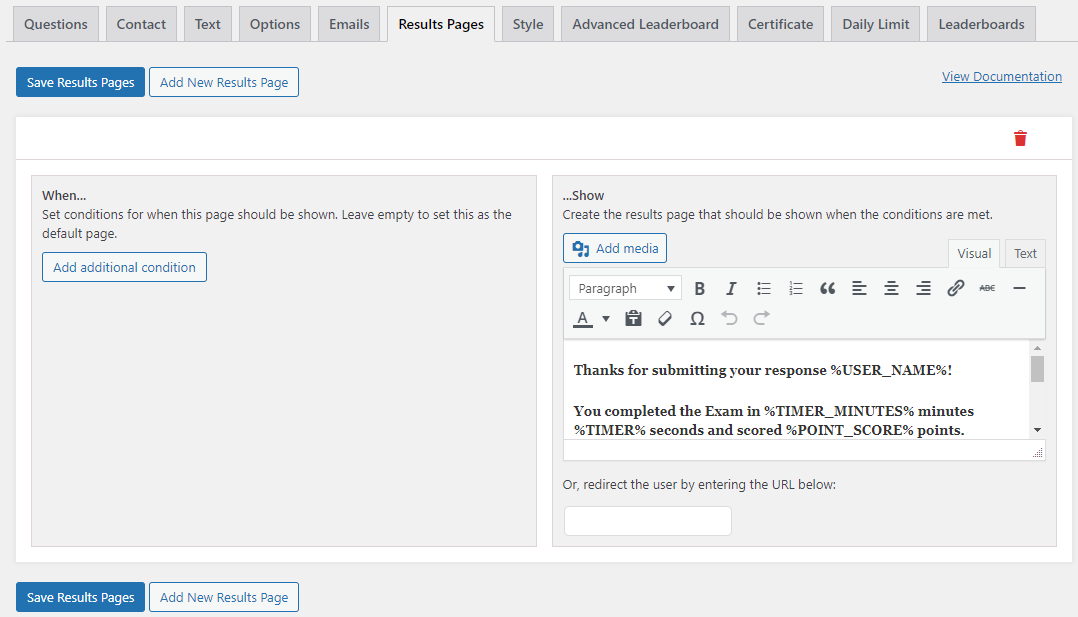
Here we can configure what needs to be shown to the respondent once they complete the exam. Just like the Emails Tab here to we have the Template Variables that are specific to the Results Tab.
- The Results Pages allow you to set up what the quiz taker sees after they take their quiz. To start editing the Results pages click on the “Results Pages” tab.
- The first time you visit this page you will see a default Results Page. This can be customized to show different results pages based on the score that the quiz taker makes.
- To add a new Results Page click on “Add New Results Page”.
- On the newly created Results Page, you can fill values in the “Score Greater Than Or Equal To” and “Score Less Than Or Equal To” to show specific results pages.
- You can also make use of the Template Variables by clicking the Insert Template Variables button,
For further information, please consult our complete documentation on setting up the results pages here.
Styling the Quiz/Survey
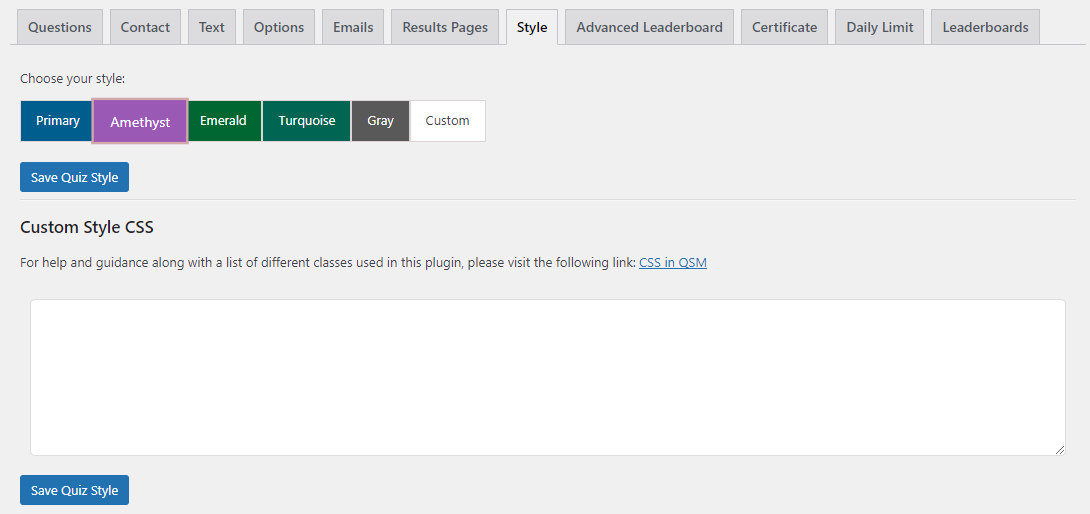
The next is the “Style” tab with some pre-defined styles. There are a total of 5 Accent Styles that come bundled with the Quiz and Survey Master Plugin. You also have the option to add your own Custom CSS Style if you happen to add one, get creative and add your custom CSS styles to it.
For further information, please consult our complete documentation on styling the Quiz/Survey here.
Adding your quiz or survey to your post or page
- If you are happy with the Set Configurations then you can go ahead and hit the Publish Quiz button to make the Quiz Live and accept responses.
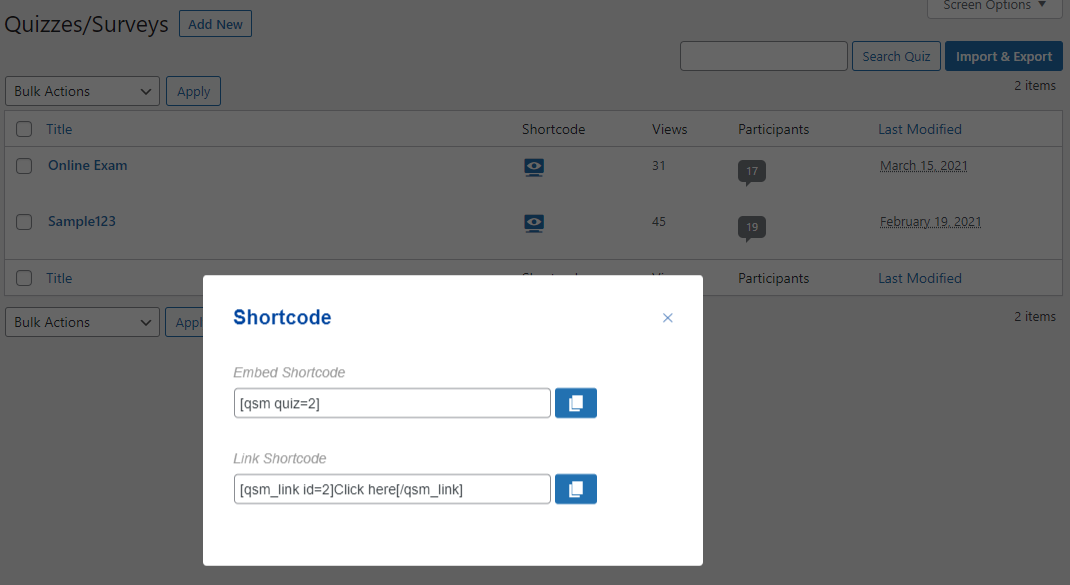
- Now to Embed the Exam on a Page, Post or just to create the exam link you require the Embed Code that you can copy by navigating to QSM > QSM Dashboard > Edit, previously created quizzes > Copy Shortcode as an Embed Shortcode or a Link Shortcode.
