Curious about how to create a customer satisfaction survey on WordPress? Customer feedback through a marketing research survey is essential for understanding their needs and improving your service.
A customer satisfaction survey can collect valuable insights about your customers’ thoughts and feelings about your business. These surveys provide crucial data to guide your marketing research surveys and enhance your offerings.
Using a WordPress survey plugin, you can easily set up a survey on your website and collect feedback in just a few steps. Whether you run an eCommerce store or a blog, these surveys are a powerful tool for boosting customer engagement and satisfaction.
Ready to elevate your business by understanding your customers better? Let’s explore how to create an effective customer satisfaction survey on WordPress!
What is a Customer Satisfaction Survey?
A customer satisfaction survey is a powerful tool that businesses use to gather feedback from customers about their experiences. Often referred to as a CSAT survey or a marketing research survey, it helps companies gauge how satisfied customers are with their products, services, or overall brand experience.

These surveys are crucial for understanding customer needs and identifying areas for improvement. Customer satisfaction surveys can be conducted through various digital channels, such as chatbots and email.
The questions within these surveys can be:
- Structured: The questions that have predefined response options
- Open-ended: The question that allows your customers to provide detailed feedback.
This flexibility enables businesses to collect the specific insights they need to make informed decisions.
Why Do You Need a Customer Satisfaction Survey?
Here we have listed down the top three important needs of the customer satisfaction survey:
1. To Know Customers’ Expectations
Customers have very high expectations when they buy any service. You can create surveys and run campaigns to know that you are meeting their expectations.
2. To Strengthen Your Relationships With Customers

You need to make sure that your customers know who you are. Customer satisfaction surveys help you build loyalty and as they engage people, they also help you in increasing popularity.
3. To Know Customers’ Experience
Any business needs to focus on their unhappy customers as much as they do on their happy customers. One should make sure that unhappy customers are contacted in person to detect the problem and fix it. For a good customer experience, you can use a customer feedback survey.
How to Create a Customer Satisfaction Survey Using QSM?
Here, we’ll show you 4 easy steps on how to create a customer satisfaction survey using Quiz and Survey Master – WordPress Survey Plugin.
Step 1: Create a New Form
Once you install and activate the Quiz and Survey Master plugin in WordPress, navigate Quizzes/Survey under QSM in the WordPress sidebar. Click on “Add New” to create a new form. You can also check our documentation to know how to install and activate the QSM.
Select a theme as per your preference and give your name to the form. In the “Form Type” field, out of the three types, Quiz, Survey, and Simple Form select “Survey“.
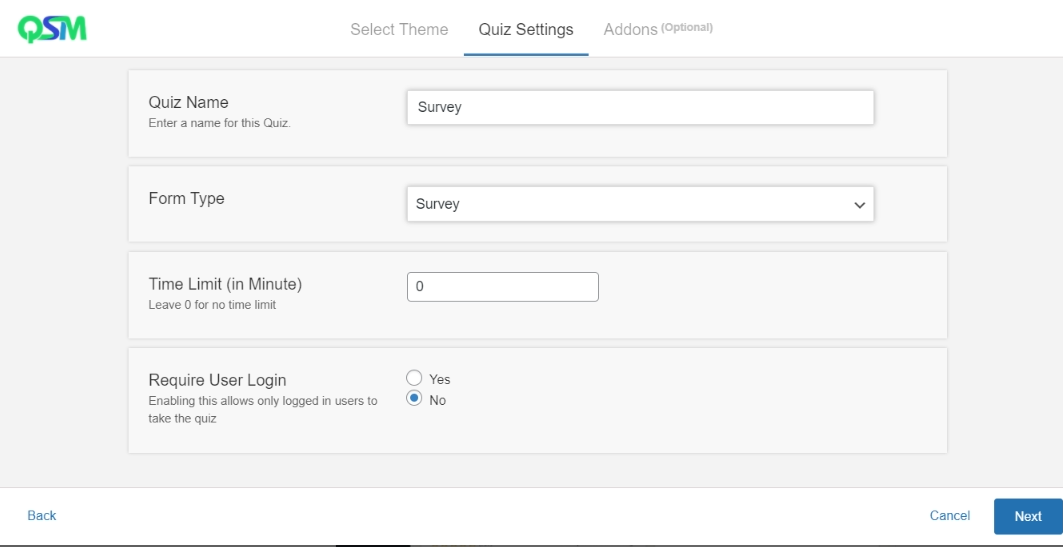
Now, select “Time Limit” for the survey. By default, there will be a value of 0, indicating no time limit for the survey.
If you want your users to log in to the site before taking a survey, select yes in the “Require User Login” field.
Also Read: Create a Quiz Using WordPress Quiz Plugin and Offer Certificates
The main ‘Quiz and Survey Master’ works for most of the users. But there are some special advanced features that some users might need. Quiz and Survey Master has 40+ add-ons. You can choose any add-on that fits your needs.
For more information on addons, read How to Install Addons.
Click on “Create Quiz” to create a new quiz.
Step 2: Add Questions
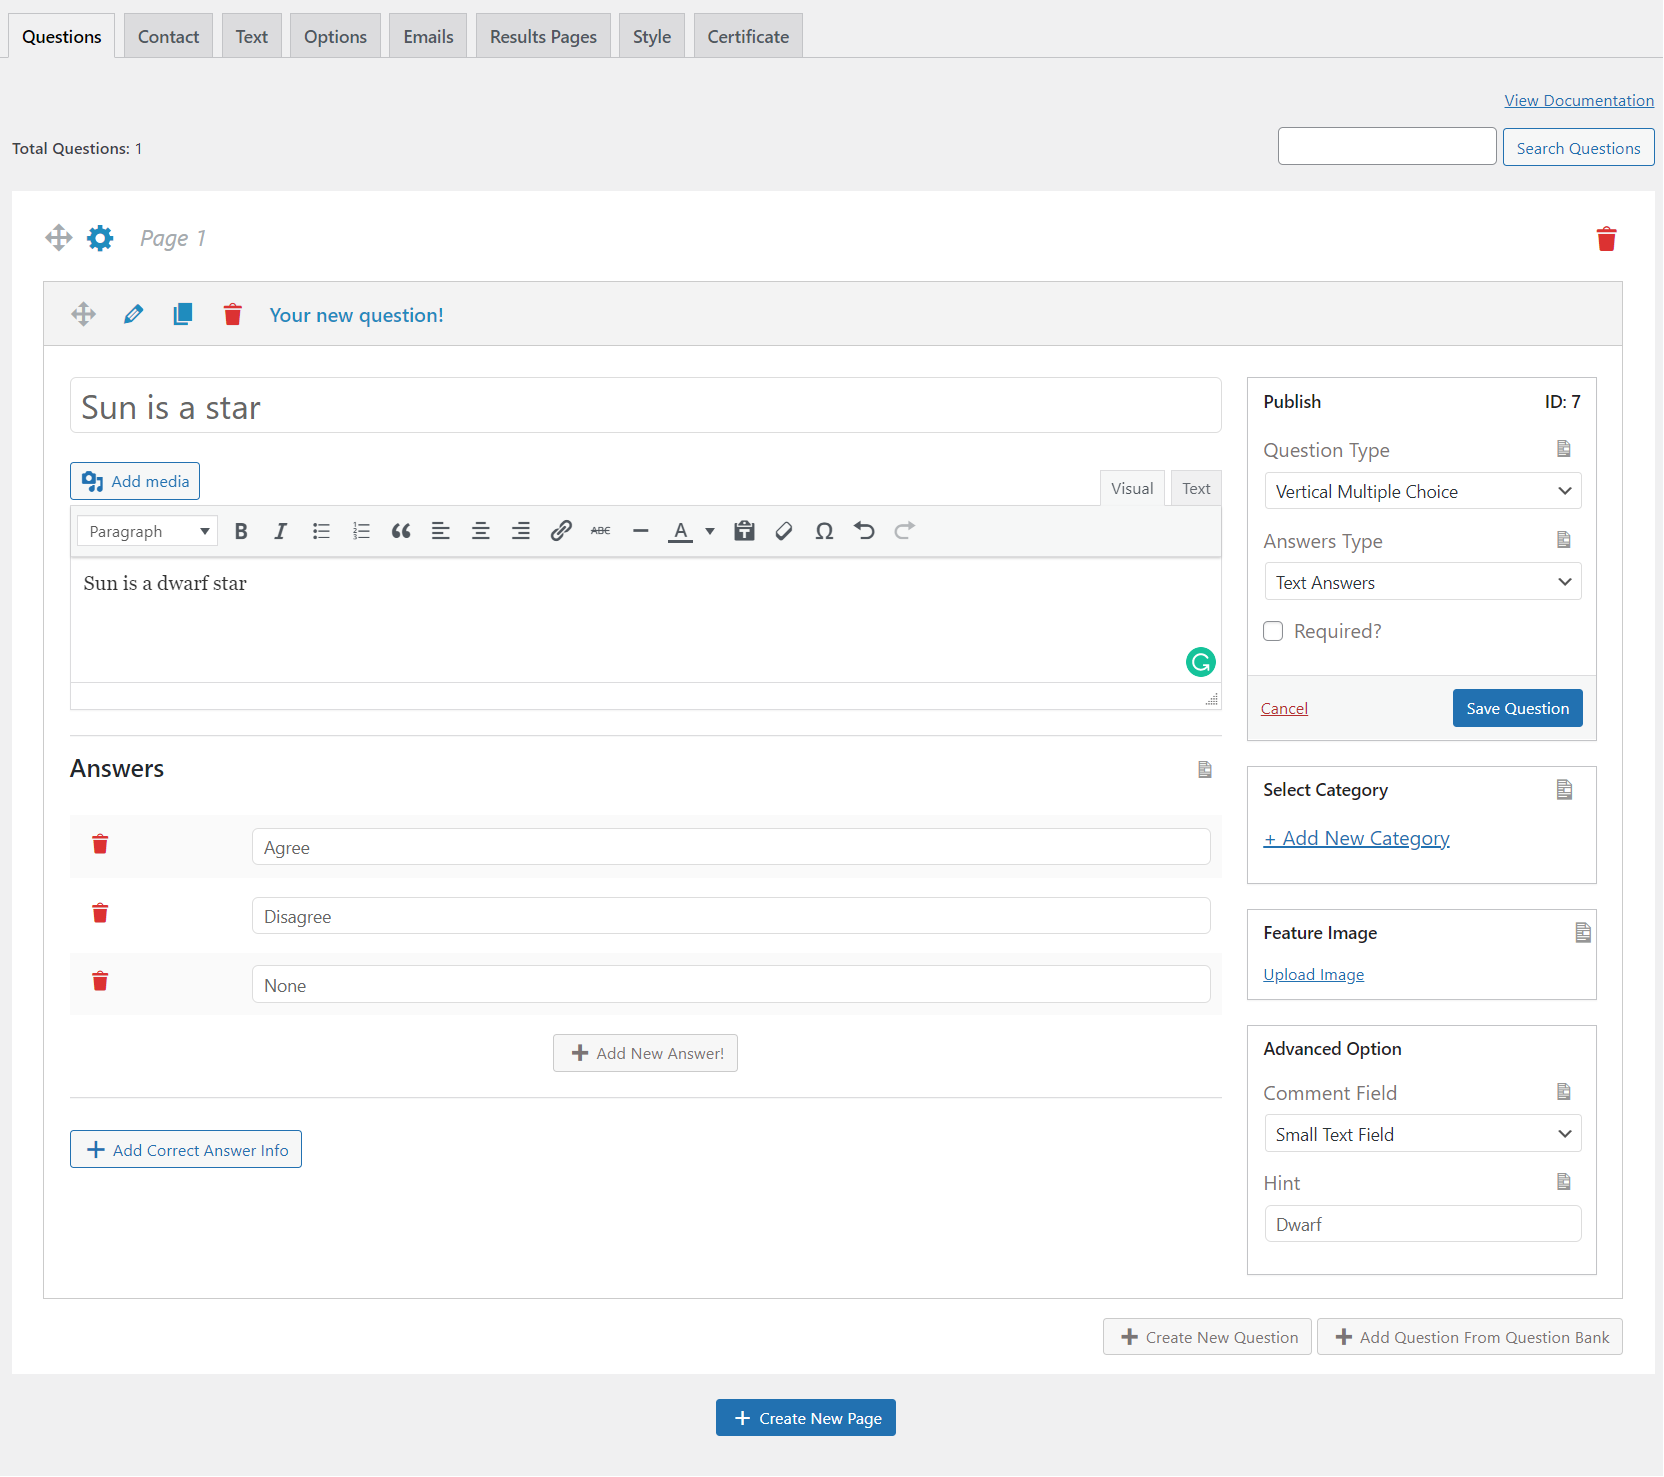
Now, it’s time to add questions to your survey. First, select a question type that goes with the requirements of your customer satisfaction survey.
Quiz and Survey Master has 15 different types of questions in question types like multiple-choice, paragraph, and 12 more. You can choose any type of question you require for your survey.
Then, type your question in the Question field and add a description to it, if needed.
For details of question types, read Question Types (Overview).
After adding a question, select answer type from the dropdown menu of “Answer Type”. There are three options for that as well. Select one. Now add answers to the survey. You can add as many options as you want.
You can even add answers’ descriptions by clicking on “Add Correct Answer Info”. This will show at the end of the survey, giving your users a detailed explanation of the answers.
If you want to categorize your options about customers’ experience, you can do that using Quiz and Survey Master. Click on “Select Category”. You can even add different categories to the same form. Click on “Add New Category”, to add a new category.
Add a featured image by clicking on “Add Image”.
After completing all these save your question by clicking on “Save Question”. Click on “Create New Questions” to add new questions, and repeat the same procedure to make a customer satisfaction survey.
Step 3: Customize Your Survey With Various Options
Quiz and Survey Master offers you various options to customize your customer satisfaction survey. Below, there is a detailed breakdown of that.
1. Contact Field:
If you want to collect your users’ data, you can use it by clicking on the “Contact” tab.
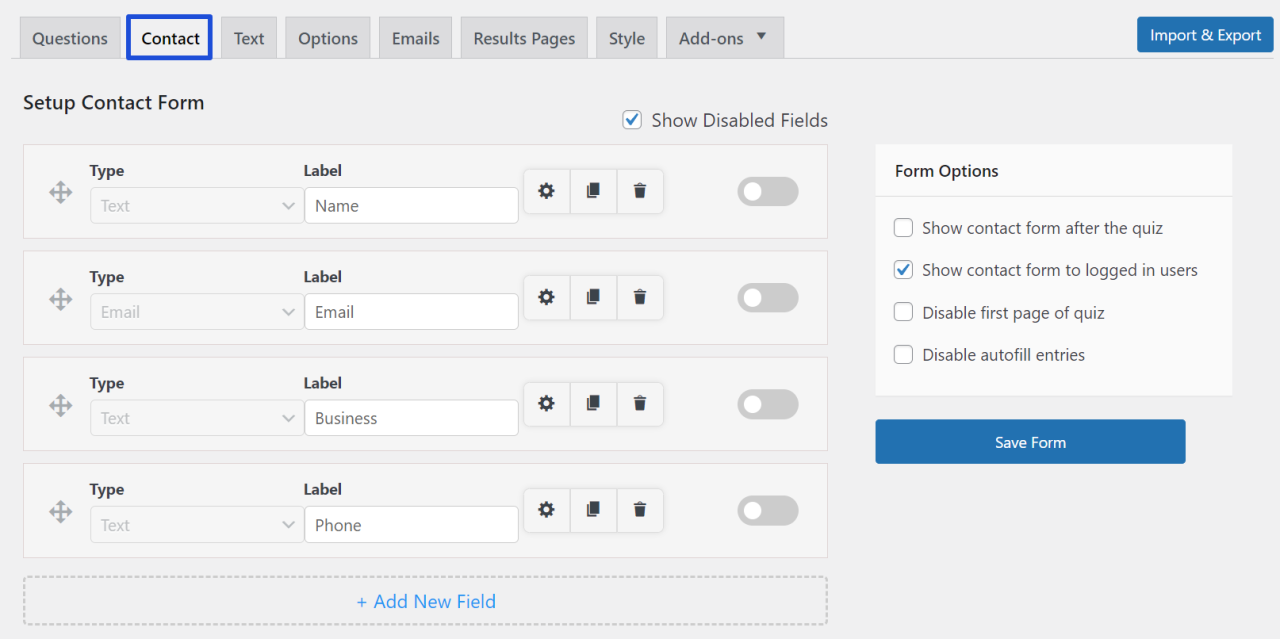
First, select a “Type” for your survey. The “Label” field is used to label the field by providing text which will appear above the field.
Also Read: Create a BuzzFeed Style Quiz on WordPress with 8 Simple Steps
Click on “Save Form” to save all the fields.
2. Text:
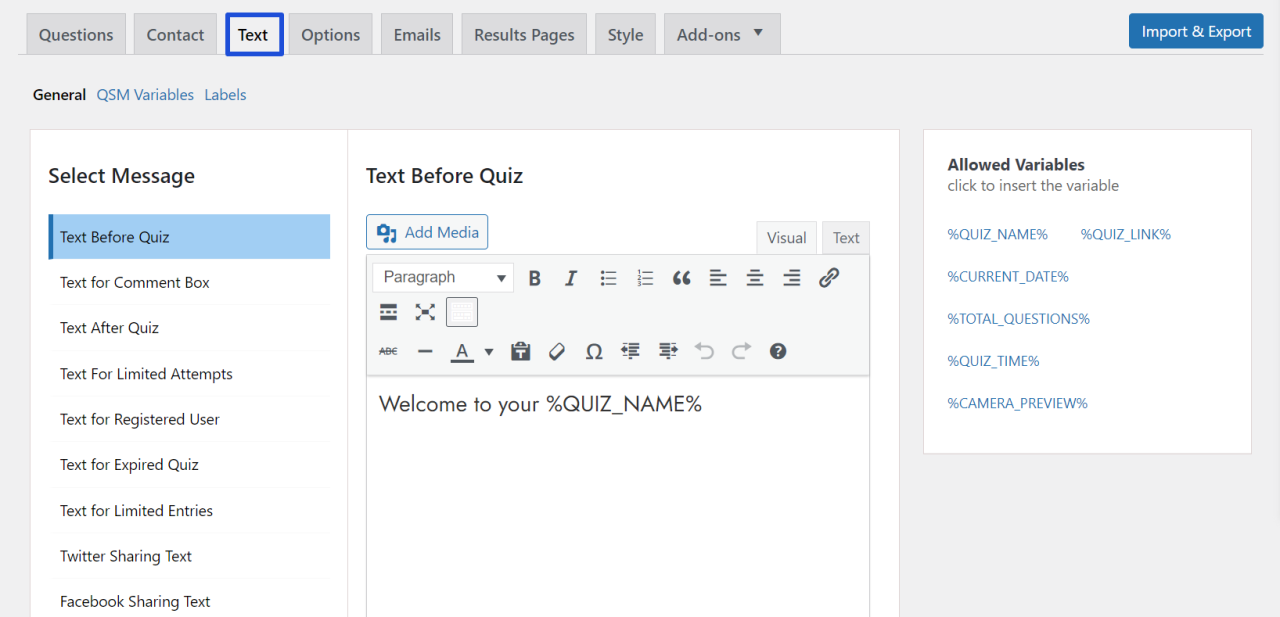
There are different options when you can provide your users with some text in a customer satisfaction survey. Click on the dropdown button. You will see around 11 such options.
Every option has a different purpose. Select one according to your needs. There are also some variables allowed which you can use to generate text. You can see those in “Allowed Variables” on the right side.
3. Options:
Under the ‘Options’ tab, you get access to various fields that you edit.
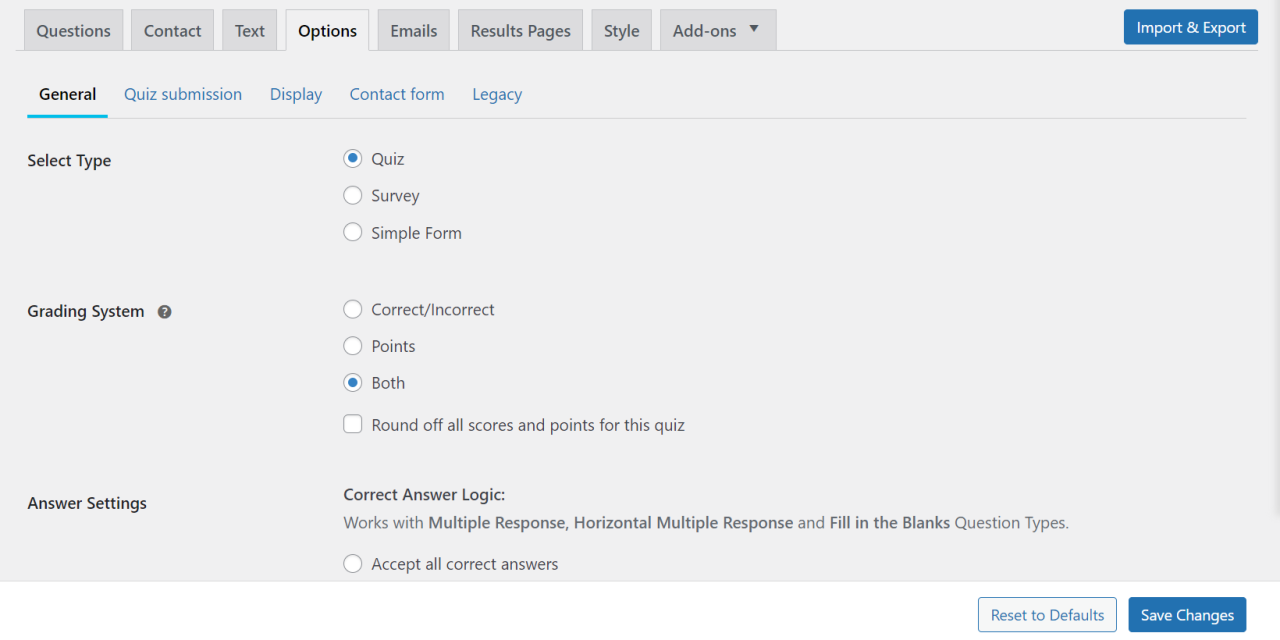
You can control your user’s activity and how you want your users to take the survey using this option. You can edit it according to your needs.
For more information on the Options tab, read the Options Tab.
4. Emails:
After your users take the survey, you might need to send them an email regarding their results or just let them know that they have submitted the survey.
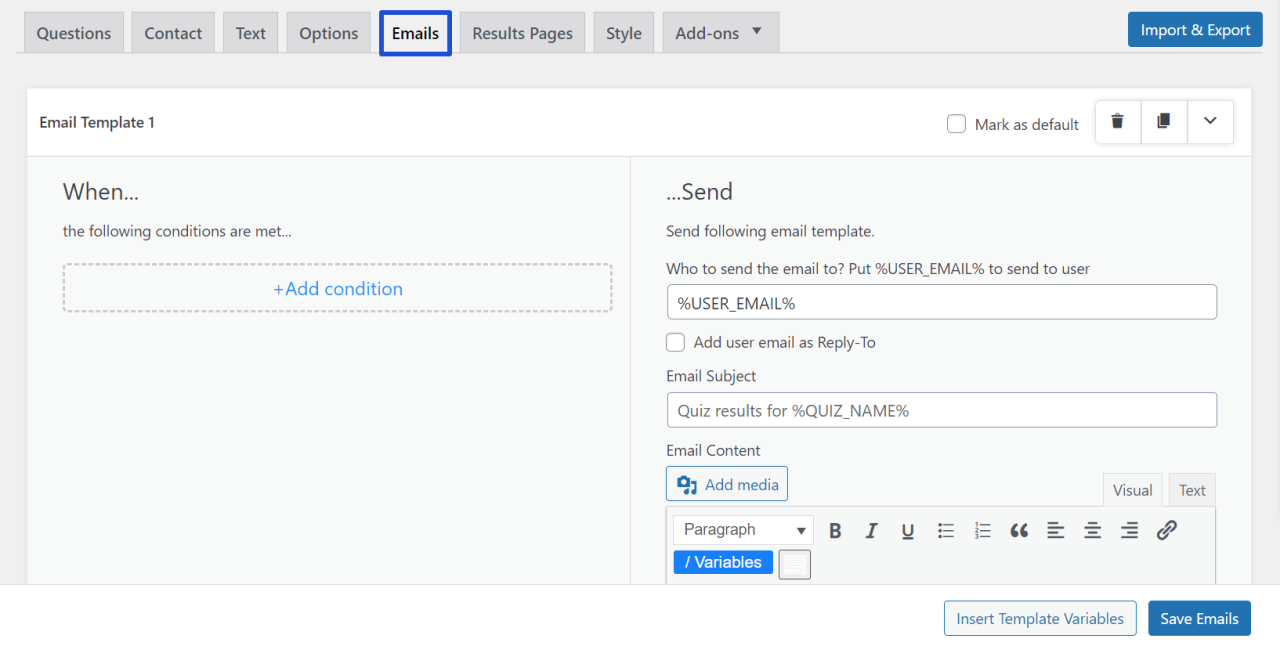
Quiz and Survey Master gives you access to edit an email using various “Template Variables”. Simply copy the variables from the “Insert Template Variable” option in the bottom-right corner. You can customize your email subject and content as per your preferences using template variables.
Click on “Add condition” to add additional conditions on when the email should be sent.
After doing all these save the email by clicking on the “Save Emails” button. An email will be sent to the users once they finish the survey.
5. Result Page:
You can create a result page for your users which will show at the end of the customer satisfaction survey. Clicking on the “Result Page” tab.
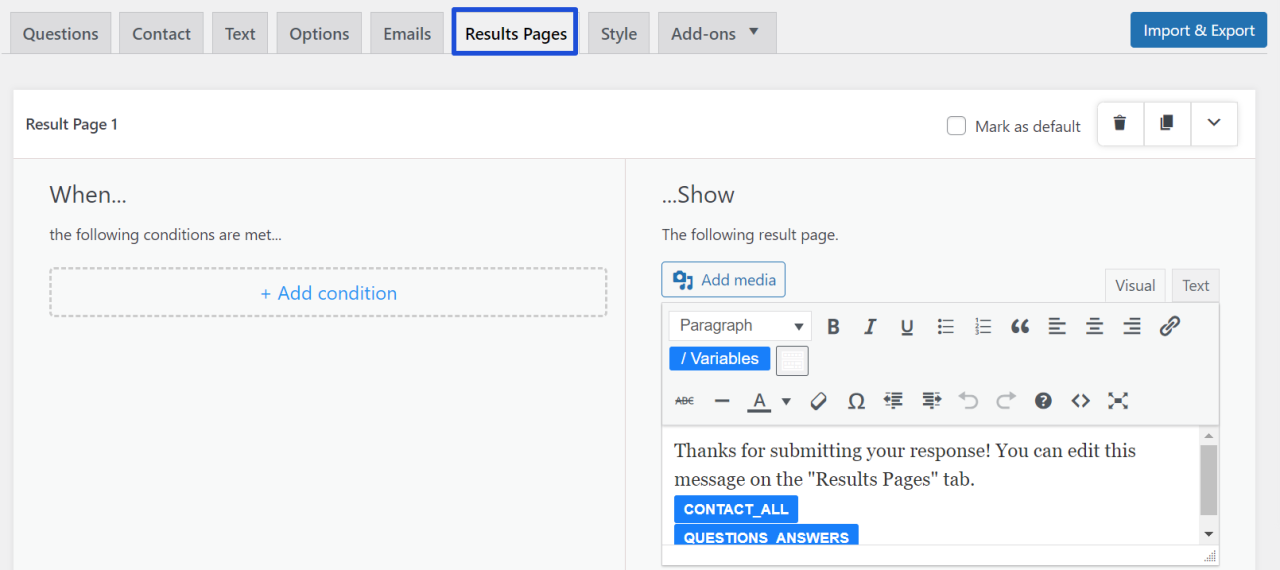
On the “Result Page” tab, you can “Add Condition” to customize your result page. By default, there are only two variables present, but you can add content like users’ names, their performance, email, and so on, using template variables.
You will again find various options to create another result page, customize it and save it by clicking on ‘Save Result Pages’.
6. Style:
Now to make your survey look good appearance-wise, you will have to select a theme for it.
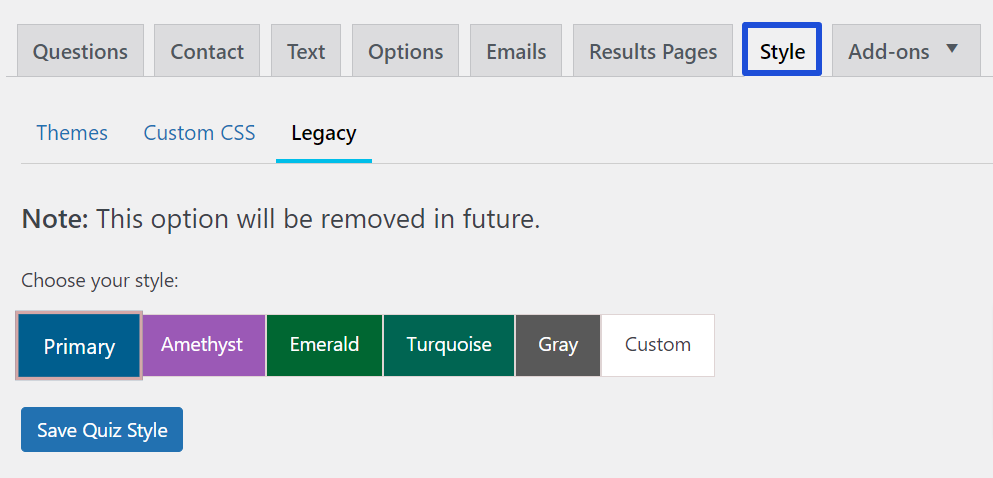
There are some predefined themes from which you can choose for your survey and also there is an option called ‘Custom Style CSS’ from which you can create a theme that fits your needs. Create a perfect theme for your customer satisfaction survey, so that you can engage your users.
Step 4: Preview and Publish
Once done with adding questions, answers, and editing, it’s important to preview your survey.
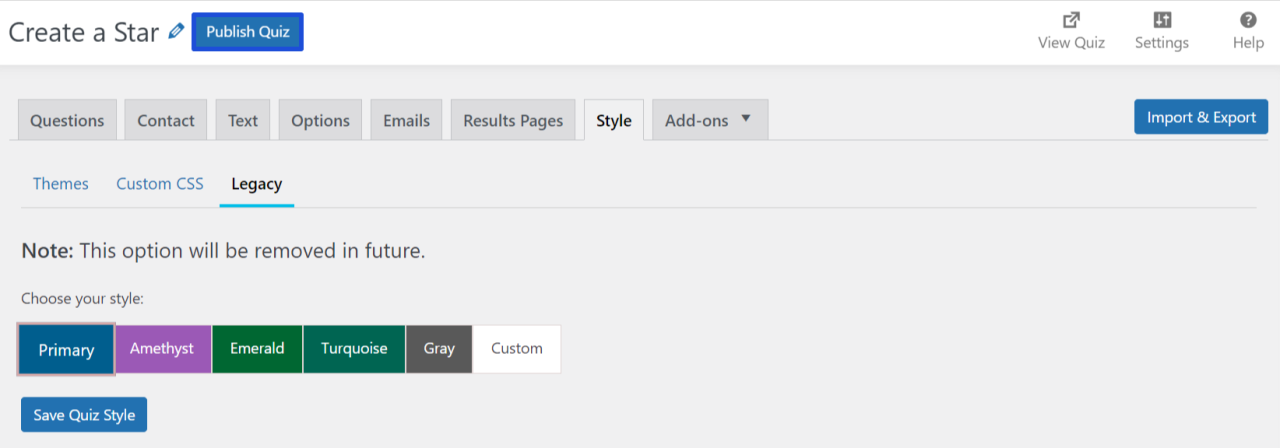
After proofreading, once you are satisfied with the customer satisfaction survey you can publish it by clicking the ‘Publish’ button on the top-right corner.
To know more about basic survey settings, read Quiz and Survey Settings.
Why Should You Collect Your Users’ Information?
1. To Increase Engagement
Once you conduct surveys, you will know your users’ experience and it will help you to make strategies to engage them.
2. To Grow Your Database:
Every single person that comes to your business is a huge marketing opportunity for your brand. By collecting users’ information you will grow your database, which in the future will help you to send emails and messages to market your products.
3. To Understand Your Audience:
Collecting users’ information will help you understand your audience’s interest and their understanding of your brand. Understanding your audience correctly can help you generate leads
Conclusion
We hope that this article helps you in creating an amazing customer satisfaction survey.
Quiz and Survey Master is a great WordPress Survey plugin for making surveys, quizzes, polls, or other types of Question Answer Forms. You can collect your user’s information and engage with your visitors with some great customer satisfaction surveys.
QSM has many useful add-ons and third-party integrations that could help you make the most of the Quizzes and Surveys. PayPal and Stripe Integration is one such addon.
Now that you know how easy it is to create surveys online, consider trying Quiz and Survey Master Pro. It includes many stunning add-ons that will enhance your customer satisfaction surveys by several times.


