The MailPoet addon for Quiz and Survey Master allows you to add users who take your quiz to your lists in MailPoet.
INSTALLATION/SETUP
Once you have purchased the addon, you will have access to download the addon. To install, upload the addon as a normal WordPress plugin. To do so, go to the Plugins page and click Add New. Then, click Upload.
From there, upload the zip file that you downloaded when downloading the addon. Once the addon has uploaded, you should now have the plugin QSM – MailPoet Integration listed in your list of plugins. Activate that plugin. Once activated, the addon will add a new tab in the Addon Settings labeled “MailPoet”.
SETTINGS/CONFIGURE

Before you can use the MailPoet Integration addon, we must first enter in the license key.
Adding Your License Key
Enter your license key from your account into the “Addon License Key” field on the “MailPoet” tab of the “Addon Settings”.
Once you have entered your license key, be sure to click “Save Changes” to save the page.
Setting up the integration options
Once the license key is entered, you can now use the “MailPoet” tab when editing your quizzes or surveys.

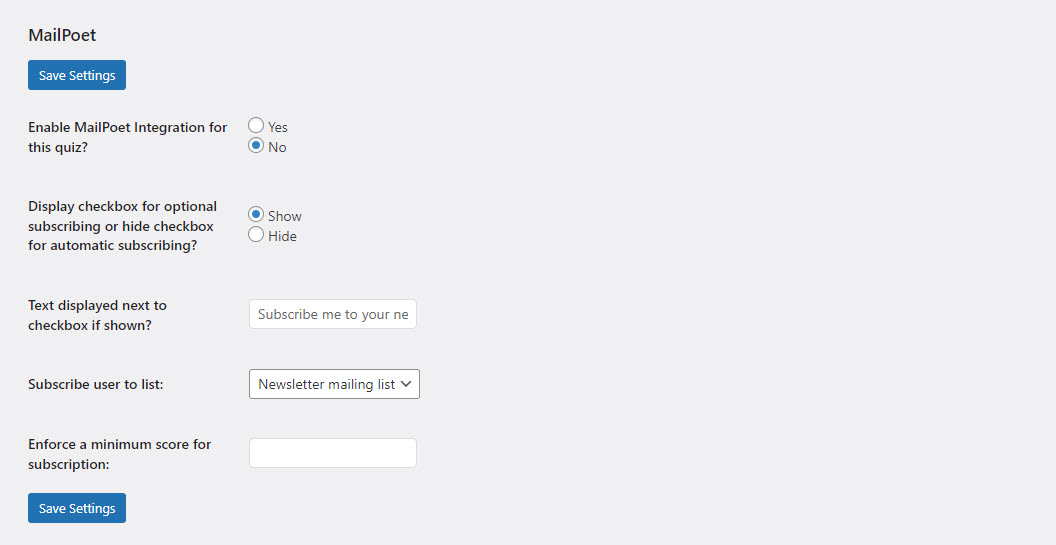
First, if you want this quiz or survey to be integrated with MailPoet, then set the “Enable MailPoet Integration for this quiz” to “Yes”.
Next, you can allow the user to choose to subscribe by checking a checkbox or you can have the user automatically subscribed. To allow the user to choose, set the “Display checkbox for optional subscribing or hide checkbox for automatic subscribing” option to “Show” and then fill in the “Text displayed next to checkbox if shown”. If you want the user to be automatically subscribed, simply set the previous option to “Hide”.
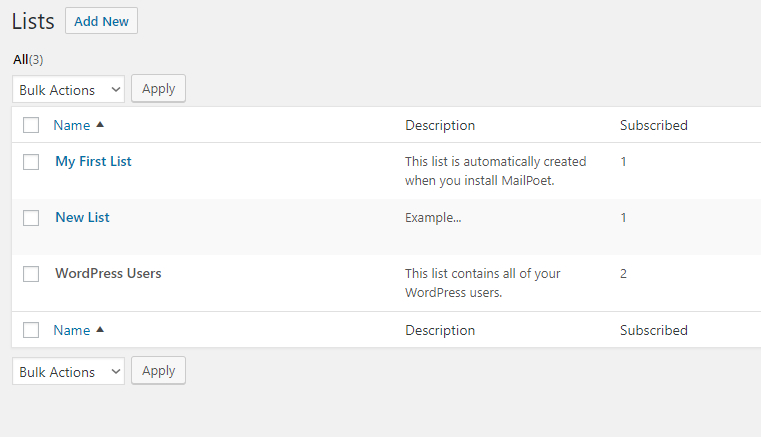
You need to select which list that you want the user to be subscribed to when the user submits the quiz or survey. These will be the lists you have created in MailPoet shown in the image below.
And, lastly, you can set a score which when met the user will be able to subscribe to the mailing list if not he won’t see the option to include himself on the mailing list.

Be sure to click “Save Settings” on the “MailPoet” tab when you are finished to save your changes.
Adding Custom Fields to MailPoet
With QSM’s MailPoet Integration Addon, you can now add custom fields & map them to the MailPoet custom fields and start receiving the subscriber data.
Step 1: Adding Custom Fields to MailPoet
From your MailPoet Plugin on your website, navigate to your preferred form to add a new custom field.
Once inside the form add a Custom Field block. Select the field type of your choice, enter a field name and label, and hit the Create button. Save your changes once done.

Step 2: Create New Contact Fields in QSM
Navigate to QSM and create a contact field to input the data for the newly created MailPoet custom field.

Step 3: Map Custom Fields with QSM Contact Fields
After creating MailPoet Custom Field & a Contact Field in QSM you now need to map the Custom Field with the QSM Contact Field for collecting the subscriber input.
In the QSM Addons tab, select MailChimp to enter the addon configuration area. Here select the Newly created Quiz Contact Field from the “Select quiz fields” dropdown adjacent to its MailPoet Custom Filed.

After selecting the appropriate field and mapping both fields, go ahead and Save your settings.
Step 4: Test your Setup & Check the Collected Subscriber Data
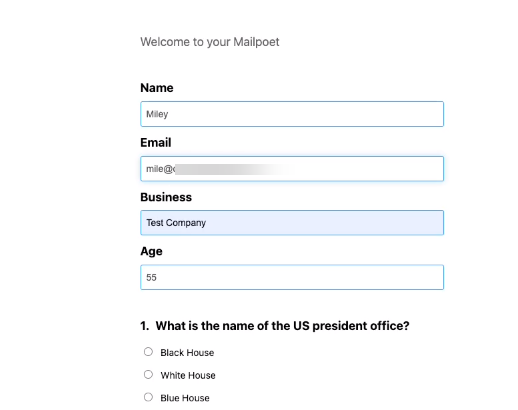
After mapping the fields now it’s time to test the setup. Goto your Quiz form and fill the Quiz Contact Form with sample data. After filling in the form and submitting the quiz with sample data you may now check it’s working.

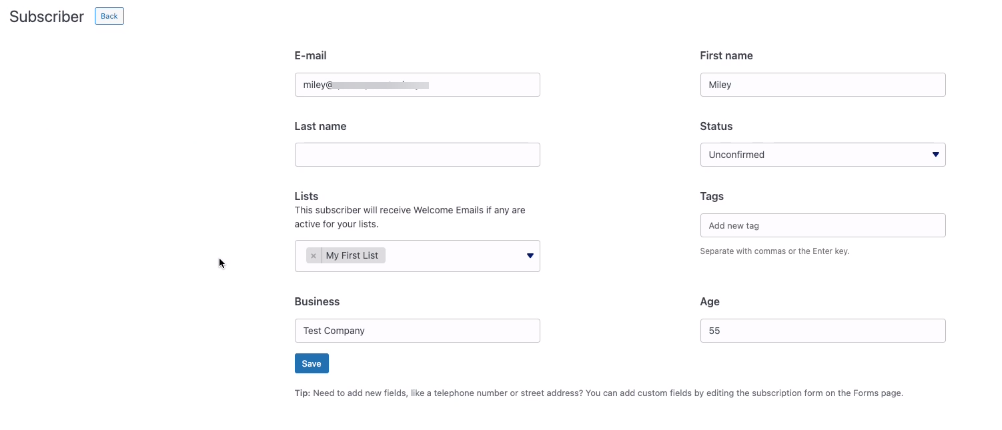
Go to your MailChimp Subscribers menu and examine the recently acquired subscriber data, you will find the Newly Created Custom Field has collected the Contact Form input with the sample data.

This is how you add MailPoet custom fields and make them work with the Quiz Contact Forms.


