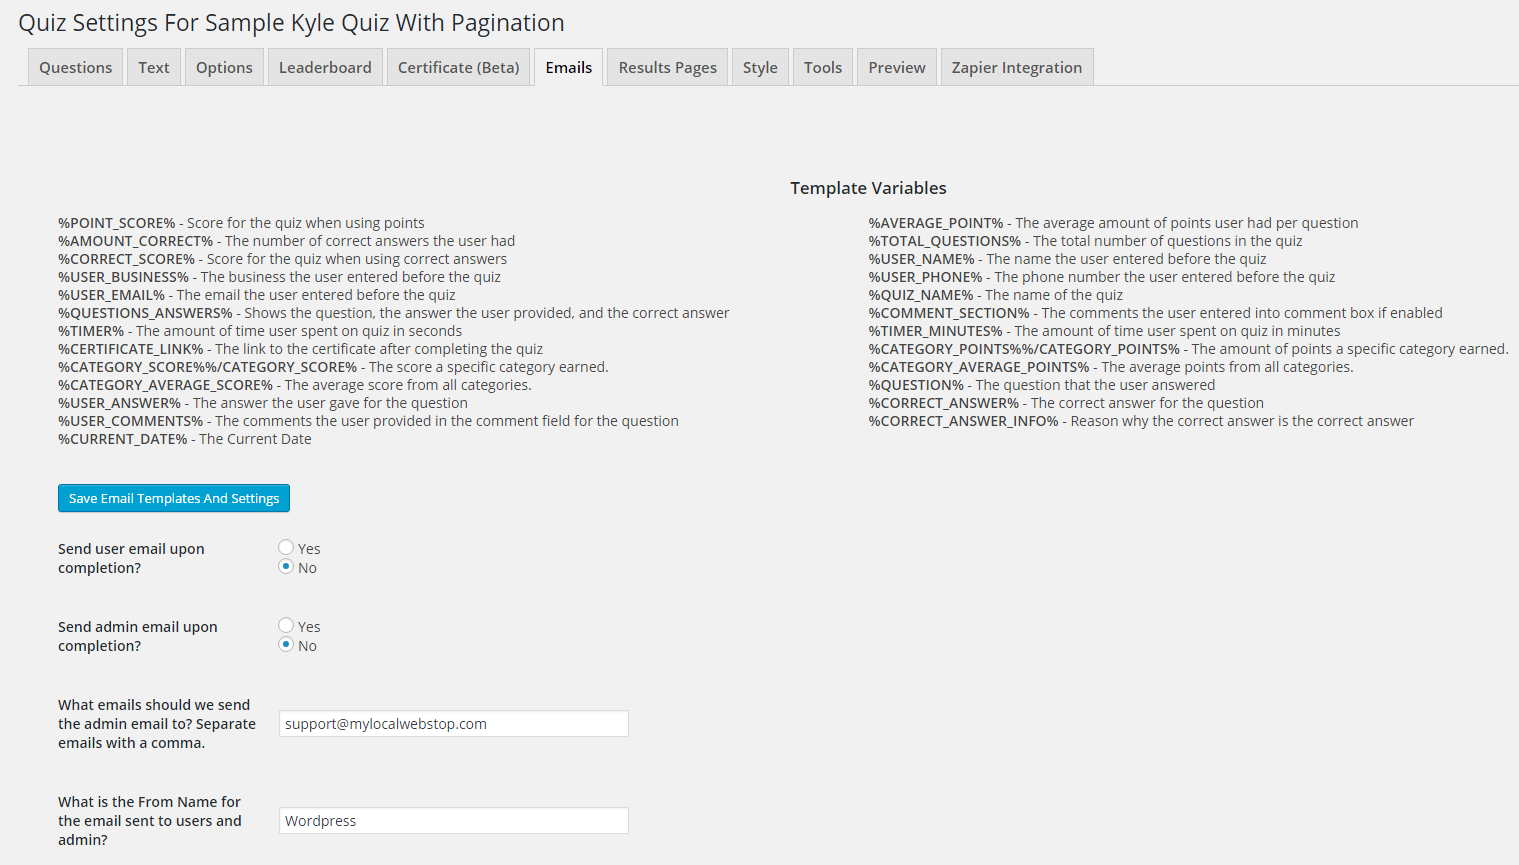
Now that we have set up our quiz settings, it is time to start setting up our emails. We can send emails to the users and admins any time a user submits our form. For the email to the user, we can set up different emails to send based on the score the user earned. To do so, navigate to the Emails tab.
First, we need to set up what emails we will be sending. If the “Send user email upon completion?” is set to yes, then when a user takes the quiz, they will receive an email. If the “Send admin email upon completion?” is set to yes, then when a user takes the quiz, the admin will receive an email.
Next, “What emails should we send the admin email to? Separate emails with a comma.” allows you to designate where to send the admin email. If you need more than one person to receive the email, simply separate the emails with a comma.
Lastly, “What is the From Name for the email sent to users and admin?” is that name that will appear in the subject bar of the email that is sent to the admin and the user.
If you are going to only send one email regardless of the user’s score, you can use the default email. If you need to send different emails based on the user’s score, you will need to add new emails using the “Add New User Email” button. Clicking on this will add your new email. The easiest way to set up your emails is to create emails for the user’s who pass and leave the default for any user that fails. For example, you could create an email for users who score in the range of 90%-100%, another email for users who score in the range of 80%-89%, and then use the default for everyone else.
To set up the score range that user must fall in to receive the email, simply enter the lowest score in the “Score Greater Than Or Equal To” column. Then, enter the highest score in the score range in the “Score Less Than Or Equal To” column.
Next, we can customize the text for the email’s subject by editing the “Subject” column.
Now, let’s create our email. Simply create your email in the “Email To Send” column while utilizing the variables at the top of our tab. Again, if necessary, refer to our guide on the variable system.
Once you are done, simply click the “Save Email Templates” button to save your changes.
The last step is to customize the email that is sent to the admin when a user submits the quiz. At the bottom of the tab, you will see the “Email Sent To Admin” section.
This process is nearly identical to the user email setup.
If you are going to only send one email regardless of the user’s score, you can use the default email. If you need to send different emails based on the user’s score, you will need to add new emails using the “Add New Admin Email” button. Clicking on this will add your new email. The easiest way to set up your emails is to create emails for the user’s who pass and leave the default for any user that fails. For example, you could create an email for users who score in the range of 90%-100%, another email for users who score in the range of 80%-89%, and then use the default for everyone else.
To set up the score range that user must fall in to receive the email, simply enter the lowest score in the “Score Greater Than Or Equal To” column. Then, enter the highest score in the score range in the “Score Less Than Or Equal To” column.
Next, we can customize the text for the email’s subject by editing the “Subject” column.
Now, let’s create our email. Simply create your email in the “Email To Send” column while utilizing the variables at the top of our tab. Again, if necessary, refer to our guide on the variable system.
Don’t forget to click the “Save Email Templates” button to save your changes.
Now that we have our emails set up, let’s set up our results page!
